Windows Azure and Cloud Computing Posts for 11/25/2013+
Top Stories This Week:
- Jai Haridas (@jaiharidas) and Brad Calder (@CalderBrad) of the Windows Azure Storage Team reported Windows Azure Storage Release - Introducing CORS, JSON, Minute Metrics, and More on 11/27/2013 in the Windows Azure Blob, Drive, Table, Queue, HDInsight and Media Services section.
- Erez Benari explained A Records, CNAME and Using DNS with Windows Azure Web Sites (WAWS) in an 11/26/2013 post in the Windows Azure Virtual Machines, Virtual Networks, Web Sites, Connect, RDP and CDN section.
- Alex Simons (@Alex_A_Simons) described Usage of and Enhancements in our GraphAPI in an 11/24/2013 post in the Windows Azure Access Control, Active Directory, Rights Management and Identity section.
- Brian Swan (@brian_swan) explained Maximizing HDInsight throughput to Azure Blob Storage in an 11/25/2013 post in the Windows Azure Blob, Drive, Table, Queue, HDInsight and Media Services section.
- The SQL Server Team (@SQLServer) described Boosting Transaction Performance in Windows Azure Virtual Machines with In-Memory OLTP in an 11/25/2013 post in the Windows Azure Virtual Machines, Virtual Networks, Web Sites, Connect, RDP and CDN section.
| A compendium of Windows Azure, Service Bus, BizTalk Services, Access Control, Caching, SQL Azure Database, and other cloud-computing articles. |
‡ Updated 11/28/2013 with new articles marked ‡.
• Updated 11/27/2013 with new articles marked •.
Note: This post is updated weekly or more frequently, depending on the availability of new articles in the following sections:
- Windows Azure Blob, Drive, Table, Queue, HDInsight and Media Services
- Windows Azure SQL Database, Federations and Reporting, Mobile Services
- Windows Azure Marketplace DataMarket, Power BI, Big Data and OData
- Windows Azure Service Bus, BizTalk Services and Workflow
- Windows Azure Access Control, Active Directory, Rights Management and Identity
- Windows Azure Virtual Machines, Virtual Networks, Web Sites, Connect, RDP and CDN
- Windows Azure Cloud Services, Caching, APIs, Tools and Test Harnesses
- Windows Azure Infrastructure and DevOps
- Windows Azure Pack, Hosting, Hyper-V and Private/Hybrid Clouds
- Visual Studio LightSwitch and Entity Framework v4+
- Cloud Security, Compliance and Governance
- Cloud Computing Events
- Other Cloud Computing Platforms and Services
<Return to section navigation list>
Windows Azure Blob, Drive, Table, Queue, HDInsight and Media Services
‡‡ Gaurav Mantri (@gmantri) added background with his New Changes to Windows Azure Storage – A Perfect Thanksgiving Gift article of 11/29/2013:
Yesterday Windows Azure Storage announced a number of enhancements to the core service. These enhancements are long awaited and with the way things are implemented, all I can say is that it was worth the wait.
In this blog post, we will go over these changes. There are so many changes that if I want to go in details for each and every change, I would end up writing this post for days. So I will try to be brief here. Then in subsequent posts, I will go over each of these enhancement in great detail with code samples and stuff.
Windows Azure Storage Team has written an excellent blog post describing these changes which you can read here: http://blogs.msdn.com/b/windowsazurestorage/archive/2013/11/27/windows-azure-storage-release-introducing-cors-json-minute-metrics-and-more.aspx. [See article below.]
Now let’s talk about the changes.
CORS Support
This has been one of the most anticipated changes in Windows Azure Storage. The support for CORS had been with other cloud storage providers for quite some time and finally its here in Windows Azure as well. Essentially CORS would allow you to interact with Windows Azure Storage directly from browsers. For example, if you want to upload blobs into Windows Azure Storage through a browser based application, prior to CORS you would have to either upload the file on your web server first and then push it into blob storage from there or host the upload code in blob storage itself (http://gauravmantri.com/2013/02/16/uploading-large-files-in-windows-azure-blob-storage-using-shared-access-signature-html-and-javascript). Now you don’t need to do that. Once the CORS is enabled, you can simply upload the files into Blob Storage directly from your browser.
The fun doesn’t stop there
. If we take Amazon for example, CORS is only enabled for S3 (which is equivalent of blob storage). With Windows Azure, the CORS is supported not only for Blob Storage but also for Table Storage and Windows Azure Queues. So now you have the power of managing your Tables and Queues directly from a browser-based application.
Let’s briefly talk about how you would go about utilizing this great feature. Based on my understanding, here’s what you would need to do:
- By default CORS is not enabled on a storage account. You would need to first enable it by specifying certain things like origin (i.e. the URL from where you will be making request to storage), allowed verbs (like PUT, POST etc.) and other things. You can enable CORS either by using REST API or using the latest version of Storage Client library (more on Storage Client library towards the end of the post).
- Once CORS is enabled, you are good to go on the server side. Now on to the client side.
- Now when your application tries to perform a request (e.g. putting a blob), a request is sent by the browser (or user agent) first to the storage service to ensure CORS is enabled before the actual operation. This is referred to as “Pre Flight” request in the CORS documentation. The browser would include a number of things in this “OPTIONS” request like request headers, HTTP method and request origin. Windows Azure Storage service will validate this request against the CORS rule set in Step 1. You don’t have to do this request, it is done by the browser automatically.
- If the “Pre Flight” request doesn’t pass the rule, the service will return a 403 error. If rules are validated then the service will return a 200 OK status code along with a number of response header. One of the important response header is “Access-Control-Max-Age” which basically tells you the number of seconds for which the browser doesn’t have to make this “Pre Flight” request again. Think of it as an authorization token validation period. Once this period has elapsed and you still need to do some work, the browser would need to make another “Pre Flight” request.
- Once the “Pre Flight” request is successful, browser automatically sends the actual request to the storage and that operation is performed.
You can read more about CORS support in Windows Azure Storage here: http://msdn.microsoft.com/en-us/library/windowsazure/dn535601.aspx.
JSON Support
Yet another important and much awaited enhancement. With the latest release, JSON is now supported on Windows Azure Tables. You can send the data in JSON format and receive the data back from storage in JSON format. Prior to this only way to send/receive data from Windows Azure Table Storage was through bulky and extremely heavy ATOM PUB XML format. To me, there are many advantages of using JSON over XML:
- The amount of data which gets sent over the wire is reduced considerably thus your application would work much-much faster.
- Not only that, table storage suddenly became somewhat cheaper as well because even though you don’t pay for data ingress you do pay for data egress (assuming the data goes out of Windows Azure Storage) and since your data egress has gone considerably smaller, you save money on egress bandwidth
egress.- It opened up a number of possibilities as far as applications are concerned. JSON has become de-facto standard for data interchange in the modern applications. Combine JSON support with CORS and Shared Access Signature and now you should be able to interact with table storage directly from a browser based application.
You can read more about JSON support in Windows Azure Table Storage here: http://msdn.microsoft.com/en-us/library/windowsazure/dn535600.aspx.
Improved Storage Analytics
Storage analytics as you may already know gives you insights into what exactly is going on with your storage requests at the storage service level. Prior to this release the metrics were aggregated on an hourly basis. What that means is that you would have to wait for at least an hour to figure out what exactly is going on at the storage level. With the latest release, on top of these hourly aggregates the data is aggregated at minute level. What this means is that you can now monitor the storage service in almost real-time basis and identify any issues much-much faster.
Content-Disposition Header for Blobs
While it was made public during the last //Build conference that support for CORS and JSON is coming soon, this was one feature which kind of surprised me (in a nice way of course).
Assume a scenario where you want your users to download the files from your storage account but you wanted to give those files a user friendly name. Furthermore, you want your users to get prompted for saving the file instead of displaying the file in browser itself (say a PDF file opening up automatically in the browser only). To accomplish this, earlier you would need to first fetch the file from your blob storage on to your server and then write the data of that file in the response stream by setting “Content-Disposition” header. In fact, I spent a good part of last week implementing the same solution. Only if I had known that this feature is coming in storage itself :).
Now you don’t need to do that. What you could do is specify a content-disposition property on the blob and set that as “attachment; filename=yourdesiredfilename” and when your user tries to access that through a browser, they will be presented with file download option.
Now you may ask, what if I have an image file which I want to show inline also and also as a downloadable item also. Very valid requirement. Well, the smart guys in the storage team has already thought about that. Not only you can set content-disposition as a blob property but you can override this property in a SAS URL (more on it in a bit).
Overriding Commonly Used Headers in SAS
This is another cool feature introduced in the latest release. As you know, blob supports standard headers like cache-control, content-type, content-encoding etc. which gets saved as blob properties. You could change them but once they are changed, the changes are permanent. For example, let’s say you have a text file with content-type set as “plain/text”. Now what you want to do is change the content type of this file to say “application/octet-stream” for some of the users. Earlier if you change the content type property to “application/octet-stream”, the change will be applicable to all the users and not for selected users which is not something you wanted in the first place.
With the new version storage service allows you to provide the new header values when you’re creating a SAS URL for that file. So when you’re creating a SAS URL, you can specify the content-type to be “application/octet-stream” and set the content-disposition to “attachment; filename=myrandomtextfilename” and when the user uses this SAS URL, they will be prompted to save the file instead of displaying it inline in the browser. Do keep in mind that the content-type of the blob in storage is still “plain/text”.
Ability to Delete Uncommitted Blobs
Sometime back I wrote a blog post about dealing with an error situation where because of messed up block ids, you simply can’t upload the blob (http://gauravmantri.com/2013/05/18/windows-azure-blob-storage-dealing-with-the-specified-blob-or-block-content-is-invalid-error/). At that time I wished for an ability to purge uncommitted blobs. Well guess what, my wish came true. With the latest release of storage service, you can indeed purge an uncommitted blob.
Support for Multiple Conditional Headers
As you may already know, with Windows Azure Storage you can perform certain operations by specifying certain pre-conditions. For example, delete a blob if it has not been modified since last 10 days etc. However you didn’t have the flexibility of specifying multiple conditional headers. With the latest release, you now have that option at least for “Get Blob” and “Get Blob Properties” operation.
You can read more about multiple conditional headers here: http://msdn.microsoft.com/en-us/library/windowsazure/dd179371.aspx
Support for ODATA Prefer Header
Now this is an interesting enhancement
Earlier I didn’t have any control over this behavior but now I do. I can now specify as a part of my request whether or not I wish to see the data I sent in my response body. Though this feature is only available for “Create Table” and “Insert Entity” operation today, I think its quite significant improvement which will go a long way.
More Changes
There are many more changes (and my fingers really hurt typing all this
How to Use These Features
Before I end this post, let’s take a moment to talk briefly about how you can avail these awesome features. Well, there are two ways by which you can do that:
- Use REST API: You can consume REST API as these features are available in the core API. The link for REST API documentation is here: http://msdn.microsoft.com/en-us/library/windowsazure/dd179355.aspx.
- Use Storage Client Library: When storage team released these changes at the REST API level, they also released a new version of .Net Storage Client library (3.0.0.0) which has full fidelity with the REST API. If you want you can download the .Net Storage Client Library through Nuget. One word of caution though: If you use this library, your code will not work in storage emulator. Essentially storage emulator is still wired to use older version of REST API (2012-02-12) while the newer version is 2013-08-15. Furthermore for table storage service, value for “DataServiceVersion” and “MaxDataServiceVersion” request headers should be “3.0;NetFx” where as older version required “2.0;NetFx“. Need less to say, I learnt the lesson hard way, however we had to migrate to the latest version as the features introduced in this release were quite important for the product we are building at Cynapta. We actually upgraded from 2.0.6.1 version of the storage client library and apart from development storage issue, we didn’t encounter any issues what so ever. If you are comfortable working with cloud storage all the time, I think it makes sense to go for an upgrade.
Summary
Though I said I will be brief, it turned out to be a rather big post
Now onto writing some code which will actually consume these awesome features.


• Jai Haridas (@jaiharidas) and Brad Calder (@CalderBrad) of the Windows Azure Storage Team reported Windows Azure Storage Release - Introducing CORS, JSON, Minute Metrics, and More on 11/27/2013:
We are excited to announce the availability of a new storage version 2013-08-15 that provides various new functionalities across Windows Azure Blobs, Tables and Queues. With this version, we are adding the following major features:
1. CORS (Cross Origin Resource Sharing): Windows Azure Blobs, Tables and Queues now support CORS to enable users to access/manipulate resources from within the browser serving a web page in a different domain than the resource being accessed. CORS is an opt-in model which users can turn on using Set/Get Service Properties. Windows Azure Storage supports both CORS preflight OPTIONS request and actual CORS requests. Please see http://msdn.microsoft.com/en-us/library/windowsazure/dn535601.aspx for more information.
2. JSON (JavaScript Object Notation): Windows Azure Tables now supports OData 3.0’s JSON format. The JSON format enables efficient wire transfer as it eliminates transferring predictable parts of the payload which are mandatory in AtomPub.
JSON is supported in 3 forms:
- No Metadata – This format is the most efficient transfer which is useful when the client is aware on how to interpret the data type for custom properties.
- Minimal Metadata – This format contains data type information for custom properties of certain types that cannot be implicitly interpreted. This is useful for query when the client is unaware of the data types such as general tools or Azure Table browsers.
- Full metadata – This format is useful for generic OData readers that requires type definition for even system properties and requires OData information like edit link, id, etc.
More information about JSON for Windows Azure Tables can be found at http://msdn.microsoft.com/en-us/library/windowsazure/dn535600.aspx
3. Minute Metrics in Windows Azure Storage Analytics: Up till now, Windows Azure Storage supported hourly aggregates of metrics, which is very useful in monitoring service availability, errors, ingress, egress, API usage, access patterns and to improve client applications and we had blogged about it here. In this new 2013-08-15 version, we are introducing Minute Metrics where data is aggregated at a minute level and typically available within five minutes. Minute level aggregates allow users to monitor client applications in a more real time manner as compared to hourly aggregates and allows users to recognize trends like spikes in request/second. With the introduction of minute level metrics, we now have the following tables in your storage account where Hour and Minute Metrics are stored:
- $MetricsHourPrimaryTransactionsBlob
- $MetricsHourPrimaryTransactionsTable
- $MetricsHourPrimaryTransactionsQueue
- $MetricsMinutePrimaryTransactionsBlob
- $MetricsMinutePrimaryTransactionsTable
- $MetricsMinutePrimaryTransactionsQueue
Please note the change in table names for hourly aggregated metrics. Though the names have changed, your old data will still be available via the new table name too.
To configure minute metrics, please use Set Service Properties REST API for Windows Azure Blob, Table and Queue with 2013-08-15 version. The Windows Azure Portal at this time does not allow configuring minute metrics but it will be available in future.
In addition to the major features listed above, we have the following below additions to our service with this release. More detailed list of changes in 2013-08-15 version can be found at http://msdn.microsoft.com/en-us/library/windowsazure/dd894041.aspx:
Copy blob now allows Shared Access Signature (SAS) to be used for the destination blob if the copy is within the same storage account.
- Windows Azure Blob service now supports Content-Disposition and ability to control response headers like cache-control, content-disposition etc. via query parameters included via SAS. Content-Disposition can also be set statically through Set Blob Properties.
- Windows Azure Blob service now supports multiple HTTP conditional headers for Get Blob and Get Blob Properties; this feature is particularly useful for access from web-browsers which are going through proxies or CDN servers which may add additional headers.
- Windows Azure Blob Service now allows Delete Blob operation on uncommitted blob (a blob that is created using Put Block operation but not committed yet using Put Block List API). Previously, the blob needed to be committed before deleting it.
- List Containers, List Blobs and List Queues starting with 2013-08-15 version will no longer return the URL address field for the resource. This was done to reduce fields that can be reconstructed on client side.
- Lease Blob and Lease Container starting with 2013-08-15 version will return ETag and Last Modified Time response headers which can be used by the lease holder to easily check if the resource has changed since it was last tracked (e.g., if the blob or its metadata was updated). The ETag value does not change for blob lease operations. Starting with 2013-08-15 version, the container lease operation will not change the ETag too.
We are also releasing an updated Windows Azure Storage Client Library here that supports the features listed above and can be used to exercise the new features. In the next couple of months, we will also release an update to the Windows Azure Storage Emulator for Windows Azure SDK 2.2. This update will support “2013-08-15” version and the new features.
In addition to the above changes, please also read the following two blog posts that discuss known issues and breaking changes for this release:
- http://blogs.msdn.com/b/windowsazurestorage/archive/2013/11/23/windows-azure-storage-known-issues-november-2013.aspx
- http://blogs.msdn.com/b/windowsazurestorage/archive/2013/11/23/windows-azure-storage-breaking-changes-for-windows-azure-tables-november-2013.aspx
Please let us know if you have any further questions either via forum or comments on this post.


Brian Swan (@brian_swan) explained Maximizing HDInsight throughput to Azure Blob Storage in an 11/25/2013 post:
The HDInsight service supports both HDFS and Windows Azure Storage (BLOB Service) for storing data. Using BLOB Storage with HDInsight gives you low-cost, redundant storage, and allows you to scale your storage needs independently of your compute needs. However, Windows Azure Storage allocates bandwidth to a storage account that can be exceeded by HDInsight clusters of sufficient size. If this occurs, Windows Azure Storage will throttle requests. This article describes when throttling may occur and how to maximize throughput to BLOB Storage by avoiding throttling.
Note: In HDInsight, HDFS is intended to be used as a cache or for intermediary storage. When a cluster is deleted, data in HDFS will be discarded. Data intended for long-term storage should be stored in Windows Azure Storage (BLOBS).
Overview
If you run a heavy I/O workload on an HDInsight cluster of sufficient size*, reads and/or writes may be throttled by Windows Azure Storage. Throttling can result in jobs running slowly, tasks failing, and (in rare cases) jobs failing. Throttling occurs when the aggregate load that a cluster puts on a storage account exceeds the allotted bandwidth for the storage account. To address this, HDInsight clusters have a tunable self-throttling mechanism that can slow read and/or write traffic to a storage account. The self-throttling mechanism exposes two parameters: fs.azure.selfthrottling.read.factor and fs.azure.selftthrottling.write.factor. These parameters govern the rate of read and write traffic from an HDInsight cluster to a storage account. Values for these parameters are set at job submission time. Values must be in the range (0, 1], where 1 corresponds to no self-throttling, 0.5 corresponds to roughly 1/2 the unrestricted throughput rate, and so on. Conservative default values for these parameters are set based on cluster size at cluster creation time ("conservative" here means that values are such that throttling is highly unlikely to occur at all, but bandwidth utilization may be below well below the allocated amount). To arrive at optimal values for the self-throttling parameters, you should turn on storage account logging prior to running a job, analyze the logs to understand if/when throttling occurred, and adjust the parameter values accordingly.
Note: We are currently working on ways for a cluster to self-tune its throughput rate to avoid throttling and maximize bandwidth utilization.
* The number of nodes required to trigger throttling by Windows Azure Storage depends on whether geo-replication is enabled for the storage account (because bandwidth allocation is different for each case). If geo-replication is enabled, clusters with more than 7 nodes may encounter throttling. If geo-replication is not enabled, clusters with more than 10 nodes may encounter throttling.
What is throttling?
Limits are placed on the bandwidth allocated to Windows Azure Storage accounts guarantee high availability for all customers. Limiting bandwidth is done by rejecting requests to storage (HTTP response 500 or 503) a storage account when the request rate exceeds the allocated bandwidth. Windows Azure Storage imposes the following bandwidth limits on a single storage account::
- Bandwidth for a Geo Redundant storage account (geo-replication on)
- Ingress - up to 5 gigabits per second
- Egress - up to 10 gigabits per second
- Bandwidth for a Locally Redundant storage account (geo-replication off)
- Ingress - up to 10 gigabits per second
- Egress - up to 15 gigabits per second
Note that these limits are subject to change. For more information, see Windows Azure’s Flat Network Storage and 2012 Scalability Targets. For information about enabling or disabling geo-replication for a storage account, see How to manage storage accounts.
When will my cluster be throttled?
An HDInsight cluster will be throttled if/when its throughput rates to Windows Azure Storage exceed those stated above. Throughput, in turn, is dependent on the nature of the job being run. Perhaps the best way to understand in advance if a job will encounter throttling is by comparing it to a well-known workload, the Terasort benchmark. With the fs.azure.selfthrottling.read.factor and fs.azure.selftthrottling.write.factor parameters each set to 1 (i.e. no self-throttling), HDInsight clusters generally encounter throttling during the Teragen and Teravalidate phases of the Terasort workload* under the following conditions:
- Geo-replication for the storage account is on and the cluster has more than 15 nodes, or
- Geo-replication for the storage account is off and the cluster has more than 31 nodes.
These numbers are for reference only. A cluster will only encounter throttling if the job that it is running produces throughput in excess of that allocated for the storage account.
* Run with 4 map slots and 2 reduce slots.
How do I know my cluster is being throttled?
Initial indications that a cluster workload is being throttled by Windows Azure Storage may include the following:
- Longer-than-expected job completion times
- A high number of task failures
- Job failures (in rare cases). If this occurs, task-attempt error messages will be of the form “java.io.IOException … caused by com.microsoft.windowsazure.services.core.storage.StorageException: The server encountered an unknown failure: The server is busy.”
While the above are indications that your cluster is being throttled, the best way to understand if your workload is being throttled is by inspecting responses returned by Windows Azure Storage. Responses with response code (http status code) of 500 or 503 indicate that a request has been throttled. One way to collect WA Storage responses is to turn on storage logging (http://www.windowsazure.com/en-us/manage/services/storage/how-to-monitor-a-storage-account/#configurelogging).
How can throttling be avoided?
If you have a workload that encounters throttling, there are three ways avoid it:
- Reduce your cluster size
- Adjust the settings that control the cluster’s self-throttling mechanism
- Request an increase in bandwidth allocated for your storage account.
The sections below go into more detail.
Reduce your cluster size
The first question to answer in avoiding throttling by Windows Azure Storage is this: Do I need all the CPUs in my cluster? In many cases, the answer here might be yes (e.g. the Terasort benchmark), in which case you can skip this section. However, some workloads that are truly I/O dominant may not require the CPUs available in a large cluster. By reducing the number of nodes in your cluster, you can reduce the load on storage and (potentially) avoid throttling (in addition to saving money!).
Adjust settings that control self-throttling
The fs.azure.selfthrottling.read.factor and fs.azure.selftthrottling.write.factor settings control the rate at which an HDInsight cluster reads and writes to Windows Azure Storage. Values for these settings must be in the range (0, 1], where 1 corresponds to no self-throttling, 0.5 corresponds to roughly 1/2 the unrestricted throughput rate, and so on. Default values for these settings are determined at cluster creation time according to the following formulas (n = number of nodes in cluster):
fs.azure.selfthrottling.read/write.factor = 1, n <= 7
fs.azure.selfthrottling.read/write.factor = 32/(5n), n > 7
The formula for n > 7 is conservative, based on the “worst-case” scenario (for a storage account with geo-replication enabled) in which the throughput capacity for each node in the cluster is maximized. In practice, this is rare. You can override the default values for these settings at job submission time. Depending on your workload, you may find that increasing the value for either or both of these settings when you submit a job improves job performance. However, increasing the default value by too much may result in throttling by Windows Azure Storage.
How do high latencies affect the self-throttling mechanism?
One of the assumptions built into the self-throttling mechanism is that end-to-end request latencies are low (in the 500ms to 1000ms range). If this assumption does not apply, bandwidth utilization may be low and/or jobs may take longer-than-expected to complete. In this case, increasing the values for fs.azure.selfthrottling.read.factor and fs.azure.selfthrottling.write.factor (within the range of (0, 1] ) may improve performance.
Request an increase in bandwidth
Another option to avoid throttling by Windows Azure Storage is to request an increase in bandwidth allocated for your storage account. This can be done by logging into WindowsAzure.com and following the steps below:
1. Click on SUPPORT and then SUPPORT OPTIONS:
2. Click Get Support:
3. In the form that opens, set the correct values in the drop-down boxes, making sure to set the SUPPORT TYPE to Billing. Click CREATE TICKET.
4. In the form that opens, choose Quota or Core Increase Requests from the Problem type dropdown:
5. In the Category drop-down box that appears, select Storage accounts.
6. Finally, click CONTINUE:
That’s it for today. I’d be interested in feedback on this feature, so please use the comments below. And, as I mentioned earlier, we are currently working on ways for a cluster to self-tune its throughput rate to avoid throttling and maximize bandwidth utilization without the need for any manual intervention.


Brian Swan (@brian_swan) provided Insights on HDInsight on 11/25/2013:
I think it’s about time I dust off this blog and realign it with my current focus: HDInsight. I’ve been heads-down since February (when I joined the HDInsight team) learning about “big data” and Hadoop. I haven’t had much time for writing, but I’m hoping to change that. I’ve learned quite a bit in the last few months, and I find that writing is the best way to solidify my learning (not to mention share what I’ve learned). If you have topics you’d like to see covered, let me know in the comments or on Twitter (@brian_swan) – I do what I can to cover them.
If you have PHP-related questions (the topic of the vast majority of the blog to date), feel free to ask them. I’ll do the best I can to answer them, but as I mentioned earlier, my recent focus has been HDInsight for the past several months.


Avkash Chauhan (@AvkashChauhan) described Handling Hadoop Error “could only be replicated to 0 nodes, instead of 1″ during copying data to HDFS or with mapreduce jobs in an 11/24/2013 post:
Sometimes copy files to HDFS or running a MapReduce jobs you might receive an error as below:
During file copy to HDFS the error and call stack look like as below:
File /platfora/uploads/test.xml could only be replicated to 0 nodes instead of minReplication (=1). There are 0 datanode(s) running and no node(s) are excluded in this operation
at org.apache.hadoop.hdfs.server.blockmanagement.BlockManager.chooseTarget(BlockManager.java:1339)
at org.apache.hadoop.hdfs.server.namenode.FSNamesystem.getAdditionalBlock(FSNamesystem.java:2198)
at org.apache.hadoop.hdfs.server.namenode.NameNodeRpcServer.addBlock(NameNodeRpcServer.java:501)
at org.apache.hadoop.hdfs.protocolPB.ClientNamenodeProtocolServerSideTranslatorPB.addBlock(ClientNamenodeProtocolServerSideTranslatorPB.java:299)
at org.apache.hadoop.hdfs.protocol.proto.ClientNamenodeProtocolProtos$ClientNamenodeProtocol$2.callBlockingMethod(ClientNamenodeProtocolProtos.java:44954)
at org.apache.hadoop.ipc.ProtobufRpcEngine$Server$ProtoBufRpcInvoker.call(ProtobufRpcEngine.java:453)
at org.apache.hadoop.ipc.RPC$Server.call(RPC.java:1002)
at org.apache.hadoop.ipc.Server$Handler$1.run(Server.java:1751)
at org.apache.hadoop.ipc.Server$Handler$1.run(Server.java:1747)
at java.security.AccessController.doPrivileged(Native Method)
at javax.security.auth.Subject.doAs(Subject.java:396)
at org.apache.hadoop.security.UserGroupInformation.doAs(UserGroupInformation.java:1408)
at org.apache.hadoop.ipc.Server$Handler.run(Server.java:1745)  UTC Timestamp: 11/20 04:14 amVersion: 2.5.4-IQT-build.73
During MapReduce job failure the error message and call stack look like as below:
DFSClient.java (line 2873) DataStreamer Exception: org.apache.hadoop.ipc.RemoteException: java.io.IOException: File ****/xyz.jar could only be replicated to 0 nodes, instead of 1
at org.apache.hadoop.hdfs.server.namenode.FSNamesystem.getAdditionalBlock(FSNamesystem.java:1569)
at org.apache.hadoop.hdfs.server.namenode.NameNode.addBlock(NameNode.java:698)
at sun.reflect.GeneratedMethodAccessor18.invoke(Unknown Source)
at sun.reflect.DelegatingMethodAccessorImpl.invoke(DelegatingMethodAccessorImpl.java:43)
at java.lang.reflect.Method.invoke(Method.java:606)
at org.apache.hadoop.ipc.RPC$Server.call(RPC.java:573)
at org.apache.hadoop.ipc.Server$Handler$1.run(Server.java:1393)
at org.apache.hadoop.ipc.Server$Handler$1.run(Server.java:1389)
at java.security.AccessController.doPrivileged(Native Method)
at javax.security.auth.Subject.doAs(Subject.java:415)
at org.apache.hadoop.security.UserGroupInformation.doAs(UserGroupInformation.java:1132)
at org.apache.hadoop.ipc.Server$Handler.run(Server.java:1387)
There could be various problems within datanode which could exhibit this issue such as:
- Inconsistency in your datanodes
- Restart your Hadoop cluster and see if this solves your problem.
- Communication between datanodes and namenode
- Network Issues
- For example if you have Hadoop in EC2 instances and due to any security reason nodes can not talk, this problem may occur. You can fix the security by putting all nodes inside same EC2 security group to solve this problem.
- Make sure that you can get datanode status from HDFS page or command line using command below:
- $hadoop dfs-admin -report
- Disk space full on datanode
- What you can do is verify disk space availability in your system and make sure Hadoop logs are not warning about disk space issue.
- Busy or unresponsive datanode
- Sometime datanodes are busy scanning block or working on a maintenance job initiated by namenode.
- Negative block size configuration etc..
- Please check the value of dfs.block.size in hdfs-site.xml and correct it per your Hadoop configuration


<Return to section navigation list>
Windows Azure SQL Database, Federations and Reporting, Mobile Services
The Windows Azure Mobile Services Team announced Operation Logs enabled for WAMS in a 10/26/2013 post:
Operation Logs is a Windows Azure Management portal feature which allows you to view historical logs of all Create/Update/Delete (CUD) operations performed on your Azure services. We recently enabled this very helpful feature for Azure Mobile Services which allow you to go back in time up to as much as 90 days to view what and when an operation was performed along with its status if it succeeded or failed.
You can access Operation Logs via Management Portal -> Management Services -> Operation Logs

You can filter the logs based on various parameters like subscription, date range, service type (e.g. Mobile Services, Web Sites), service name or status (of the operation e.g. Succeeded, Failed)
Here is a listing of sample operation logs Mobile Services from my test subscription. We comprehensively cover all the Mobile Services CUD operations performed on Mobile service, Tables, Custom API, Scheduled Job.
Note that for each operation you see the Timestamp when the operation was executed, status of the operation if it succeeded or failed, service name (the name of your Azure Mobile service appended by the resource name e.g table name or custom API name or scheduler script name), service type (Mobile Services in this case) and Caller (we add this information when we are able to detect if the request came from the portal or from the client e.g. Azure CLI)
Note that for each operation we add some additional information which can be found by clicking the Details button for the operation. For example: following is a log entry for an operation called Create Table which was successfully executed from the portal for an application called piyushjoStore and the table name created was DeliveryOrder.
If you click the Details button then an Operation Details popup will display more details e.g. the table permissions with which this table was configured at the time of its creation:

If you see a failed request then it also become easy for the Microsoft support personnel to track down the request and possible reason for it based on the ActivityId displayed here.


<Return to section navigation list>
Windows Azure Marketplace DataMarket, Cloud Numerics, Big Data and OData
‡ Rowan Miller reported EF6.0.2 Beta 1 Available on NuGet in an 11/27/2013 post to the ADO.NET Blog:
We recently shared our plans to produce a 6.0.2 patch release to address some performance issues (and other bugs) in the 6.0.0 and 6.0.1 releases. Today we are making Beta 1 of the 6.0.2 release available.
Why the beta?
We were originally planning to go straight to RTM and have the 6.0.2 patch available in the month of November. Some of the fixes are proving harder to implement and test/verify than we expected, so we need a bit more time to finish the fixes and ensure that performance is improved. In order to keep our commitment to have a release available this month, we’ve opted to release the current code base – which includes a number of improvements – as a beta.
Can I use it in production?
Yes, with some caveats. The license does not prevent you from using the release in production. We’re still testing the changes we’ve made and there are more changes still to come. Microsoft does not guarantee any particular level of support on this beta.
Where do I get the beta?
The runtime is available on NuGet. If you are using Code First then there is no need to install the tooling. Follow the instructions on our Get It page for installing the latest pre-release version of Entity Framework runtime.
The tooling for Visual Studio 2012 and 2013 is available on the Microsoft Download Center. You only need to install the tooling if you want to use Model First or Database First.
Note: If you are installing the tools for Visual Studio 2012, you will need to uninstall the existing Entity Framework Tools for Visual Studio 2012 (via Add/Remove Programs) before installing the new MSI. This is due to a temporary issue with the Beta 1 installer that will be fixed for RTM.
When can I expect the RTM?
Getting the 6.0.2 patch release to RTM is our teams top priority. We expect to have it available during December.
What if I find an issue in the beta?
Make sure it’s not something we already know about that is tracked to be fixed in 6.0.2. If it’s not, please file a new issue – be sure to include detailed steps on how to reproduce it, preferably including source code.
What’s in the beta?
Fixes to the following issues are included in Beta 1. We haven’t finished verifying all these issues..
- [Performance] Startup time is bad with debugger attached
- [Performance] Buffered queries are executed in non-sequential mode
- [Performance] Revert buffering by default
- [Performance] Remove calls to BufferedDataReader.AssertFieldIsReady
- Memory leak in case of usage an external connection
- “The given key was not present in the dictionary.” when adding Association to Entities - all mapped to Views
- Code first stored procedure mapping fails when the stored procedures have more than 25 parameter mappings
- EF6 regression: identity pattern not applied to key by convention in simple inheritance scenario
- [UpForGrabs] Remove EF.PowerShell.dll from SqlServerCe package
- Race condition in InitializeMappingViewCacheFactory
- Migrating from EF5 to EF6: InversePropertyAttribute broken?
- Code First: TPC with joins from base class to Identity ApplicationUser Fails
- Moving from EF5 -> EF6: Invalid Column Name error
- Having System.ComponentModel.DataAnnotations.MaxLength() applied to a string property leads to InvalidCastException exception
- Unable to cast Anonymous Type from 'System.Linq.IQueryable' to 'System.Data.Entity.Core.Objects.ObjectQuery'
- Designer: Can not reverse engineer EDMX when FKs in different order than PKs (composite keys)
- EF Configuration Cause Null Reference Exception.
- Stored Procs :: Concurrency check on value types in conjunction with stored procedures doesn't work properly
- TypeLoadException thrown for a class nested in an internal class
<Return to section navigation list>
Windows Azure Service Bus, BizTalk Services and Workflow
‡‡ Paolo Salvatori (@babosbird) announced availability of an Improved version of Service Bus Explorer 2.1 and new version 2.2 on 11/29/2013:
I just released an improved version of the Service Bus Explorer 2.1 and a new version of the tool based on the Microsoft.ServiceBus.dll 2.2.1.1.
The zip file contains:
- The source code for the Service Bus Explorer 2.2.1.1. This version of the tool uses the Microsoft.ServiceBus.dll 2.2.1.1 that is compatible with the current version of the Windows Azure Service Bus, but not with the Service Bus 1.1, that is, the current version of the on-premises version of the Service Bus.
- The Service Bus Explorer 2.1. This version can be used with the Service Bus 1.1. The Service Bus Explorer 2.1 uses the Microsoft.ServiceBus.dll client library which is compatible with the Service Bus for Windows Server 1.1 RTM version, but not with the 1.1 Beta version or the Service Bus for Windows Server 1.0. For this reason, for those of you that are still using the Service Bus for Windows Server version 1.0, I included the old version (1.8) of the Service Bus Explorer in a zip file called 1.8 which in turn is contained in the zip file of the current version. The old version of the Service Bus Explorer uses the Microsoft.ServiceBus.dll 1.8 which is compatible with the Service Bus for Windows Server. For those of you that are instead using the Service Bus for Windows Server 1.1 Beta, you can download the Service Bus Explorer 2.0 from my SkyDrive.
- The Service Bus Explorer 1.8. This version can be used with the Service Bus 1.0
This version introduces the following updates for both the 2.1 and 2.2 version:
- Added support to read the body of a WCF message when the payload is in JSON format.
- Added support to send the body of a WCF message when the payload is in JSON format.
- Implemented the possibility to pass command line arguments for both the 2.1 and 2.2 version:
ServiceBusExplorer.exe [-c|/c] [connectionstring]
[-q|/q] [queue odata filter expression]
[-t|/t] [topic odata filter expression]
[-s|/s] [subscription odata filter expression]ServiceBusExplorer.exe [-n|/n] [namespace key in the configuration file]
[-q|/q] [queue odata filter expression]
[-t|/t] [topic odata filter expression]
[-s|/s] [subscription odata filter expression]Example: ServiceBusExplorer.exe -n paolosalvatori -q "Startswith(Path, 'request') Eq true" -t "Startswith(Path, 'request') Eq true"
- Improved check when settings properties for Topics and Subscriptions.
- Fixed an error that added columns to message and deadletter datagridview every time the Update button was pressed.Fixed a error on CellDoubleClick for messages and deadletter datagridview that happened when double clicking a header cell.Improved the visualization of sessions and added the possibility to sort sessions by column.
- Added sorting capability to messages and deadletter messages datagridview for queues and subscriptions. Click the column header to sort rows by the corresponfing property value in ASC or DESC order.
- Added sorting capability to sessions datagridview for queues and subscriptions. Click the column header to sort rows by the corresponfing property value in ASC or DESC order.
- Added sorting capability to registrations datagridview for notification hubs. Click the column header to sort rows by the corresponfing property value in ASC or DESC order.
- Introduced the possibility to define filter expression for peeked/received messages/deadletter messages. Click the button highlighted in the picture below to open a dialog and define a filtter expression using a SQL Expression (e.g. sys.Size > 300 and sys.Label='Service Bus Explorer' and City='Pisa'). For more information, see SqlFilter.SqlExpression Property.
- Introduced the possibility to define filter expression for peeked/received messages/deadletter messages. Click the button highlighted in the picture below to open a dialog and define a filtter expression using a SQL Expression on public and n on public properties of RegistrationDescription class (e.g. PlatformType contains 'windows' and ExpirationTime > '2014-2-5' and TagsString contains 'productservice'). The filter engine supports the following predicates:
- =
- !=
- >
- >=
- <
- <=
- StartsWith
- EndsWith
- Contains
- Introduced support for TagExpressions introduced by Service Bus 2.2. When sending a notification, you can select the Tag Expression or Notification Tags to define, respectively, a tag expression (e.g. productservice && (Italy || UK)) or a list of tags. This feature is available only in the Service Bus Explorer 2.2.
- Introduced support for partitioned queues. For more information on partitioned entities, readPartitioned Service Bus Queues and Topics. This feature is available only in the Service Bus Explorer 2.2.
- Introduced support for partitioned topics. For more information on partitioned entities, read Partitioned Service Bus Queues and Topics. This feature is available only in the Service Bus Explorer 2.2.


‡‡ Nick Harris (@cloudnick) and Chris Risner (@chrisrisner) produced CloudCover Episode 120: Service Agility with the Service Gateway for Channel9 on 11/21/2013 (missed when published):
In this episode Nick Harris and Chris Risner are joined by James Baker, Principle SDE on the Windows Azure Technical Evangelism team. In this episode James goes over the Service Gateway project. The Service Gateway provides an architectural component that businesses can use for composition of disparate web assets. Using the gateway, an IT-Pro can control the configuration of:
- Roles
- AuthN/AuthZ
- A/B Testing
- Tracing
You can read more about the Service Gateway and access the source code for it here.

<Return to section navigation list>
Windows Azure Cloud Services, Caching, APIs, Tools and Test Harnesses
• My (@rogerjenn) Visual Studio 2013 launch brings free Azure-based VSO preview article of 11/27/2013 for SearchCloudComputing.com begins (free registration required):
Last month, Microsoft made available Visual Studio 2013 for developers but waited until now to release Visual Studio Online, which enables source code control and simplifies application lifecycle management in Windows Azure.
A Windows Azure-based Visual Studio Online (VSO) public preview is available for Visual Studio 2013, with free basic previews for up to five developers. In a blog post, S. "Soma" Somasegar, corporate vice president of the developer division, described VSO's components, most of which are cloud-based implementations of on-premises Team Foundation Server 2013 features:
- Hosted source control -- Provides an unlimited private source code repository and lets you check code directly into Visual Studio, Eclipse or any Git client. You can use Team Foundation Version control or Git for distributed versioning.
- Build service -- Enables continuous integration. You can build or rebuild projects on demand, nightly or after every check-in, and automatically deploy builds to Windows Azure. All Visual Studio Online users receive 60 minutes per month of free build services.
- Work items and Agile planning services -- Supports the build-and-deployment process with templates for Scrum.
- Elastic load test service in Windows Azure cloud -- Lets developers quickly scale up to simulate large numbers of concurrent users. All VSO users get 15,000 free virtual user minutes per month.
- Application Insights service -- Generates data about application availability, performance and usage and analyzes the data to measure the application's overall health.
- The new "Monaco" lightweight, browser-based editor for Windows Azure Web Sites -- Facilitates development in the cloud.
Like other Microsoft Software as a Service (SaaS) cloud offerings, such as Office 365, the pre-built, pay-as-you-go Visual Studio Online services minimizes or eliminates upfront costs for computers and related infrastructure and development software. Most developers using Visual Studio on-premises likely will start with a free Visual Studio Online account by signing up at the visualstudio.com site and defining a test project (Figure 1). …

Read the rest of the article here.

Return to section navigation list>
Windows Azure Infrastructure and DevOps
Adetayo Adegoke posted Windows Azure for ITPros Webinar Followup to the Perficient blog on 11/24/2013:
I gave a presentation about Windows Azure the other day, and got some great questions that I would like to address with this blog post. Here they are in no particular order, with some answers I hope are useful to you:
“We have multiple Operating Companies who may want to leverage the features of Windows Azure. Is it recommended to setup a separate Windows Azure tenant for each Operating Company or Unit?”
This is an interesting operations question. I have worked with customers with separate independent organizational structures. Some of these firms converged, others diverged while some stayed put as is. Each situation has its own set of operational challenges. I am a big fan of simplicity, so I am naturally inclined to say use a single subscription if possible. There are some efficiencies you gain by having a single subscription – billing simplicity, single point of administration, technology solution simplicity, intra versus inter network performance and so on. From these broader advantages, you might start to recognize indirect benefits – sharing customized gold VM images across organizational departments/divisions, using the cloud as a model of security identity consolidation especially if this is something that is likely to happen with OnPremise Directory deployments later on, connecting resources and merging data together from these operating units est.
However there might be legal/regulatory/policy reasons for keeping individual subscriptions for each operating unit of the organization. For example, you might have two operating units in different countries, each with data and assets that should be kept physically separate as much as possible, from a legal and regulatory perspective. Check with the Legal/Policy department. Another reason is billing. If invoices are not handled by a single entity within the organization, it might be necessary to have separate subscriptions, so that you can bill each organization appropriately. With single and multiple subscriptions, I think you should have at least one person that has administrative access to all subscriptions, and has an organization wide view of how Windows Azure is being utilized.
“What about HIPAA compliance?”
Specific Windows Azure features [Virtual Machines, Cloud Services, Storage – Tables, Blobs, Queues, and Drives – and Networking] are covered by HIPAA BAA [Business Associate], an offering Microsoft provides to organizations that have Enterprise Agreements with them. Not all Windows Azure features are covered [for example, Media services] but that might change in the future as Microsoft works to expand coverage to its growing portfolio of Windows Azure services. If you are interested in Windows Azure and you belong to an organization that deals with PHI data, contact your Microsoft Account Manager to make sure that Windows Azure covers your specific needs.
Windows Azure meets other data protection and privacy laws: ISO/IEC 27001:2005 Audit and Certification, SOC 1 and SOC 2 SSAE 16/ISAE 3402 Attestation, Cloud Security Alliance Cloud Controls Matrix and Federal Risk and Authorization Management Program (FedRAMP). For more information please review Microsoft’s Windows Azure Trust Center Compliance Page
“Does it mean multiple customer shares one VM for the free and shared model?
Let’s start with some background to this question: the Windows Azure Web Sites feature is PaaS [Platform-as-a-Service] offering from Microsoft that currently comes in three flavors: Free [host up to ten sites], Shared and Standard. Both Free and Shared modes share the same architecture, and this architecture does host multiple websites instances for various subscribers/Windows Azure customers using a Shared VM approach. To get dedicated VMs for your applications, you would have to deploy your web site to the Windows Azure Web Sites Standard model. Each model plays really well to different scenarios. For example, it might make sense for your organization to use the free mode for your development environment, the Shared mode for QA and the dedicated mode for Production.
“Are the Server Platforms supported in Private Cloud Hosting?”
Again, some perspective with regards to this question: As of November 2013 Windows Azure Virtual Machines officially supports the following minimum platform versions – 64-bit versions of SQL Server 2008, SharePoint Server 2010, Team Foundation Server 2012, Project Server 2013, System Center 2012 SP1, HPC Pack 2012, BizTalk Server 2013, Dynamics GP 2013, Dynamics NAV 2013 and Forefront Identity Manager 2010 R2 SP1,. That is not to say that you cannot install earlier versions of these platforms on Windows Azure VMs. However, even though such workloads install successfully, they will not be supported by Microsoft. Which might be okay if you need to spin up a Development environment, and don’t really require support from Microsoft.
This leads up to the original question, which is more about private clouds, and not public offerings like Windows Azure. Microsoft uses their own virtualization platform to run Windows Azure (Hyper-V). As such, if you are running a Microsoft Hyper-V Virtualization Platform Private Cloud solution, the platforms listed above are supported as well, at a minimum. In fact, at the moment, OnPremise Private Cloud Hyper-V deployments supports even more server platforms than Windows Azure currently does. If you are using VMware or open source products instead, you will need to check with your vendor to ensure that your workload will be supported if it is virtualized on their platform.
For more information, take a look at the following: Hyper-V Supported Virtual Machines and Guest Operating Systems, Microsoft Server Software and Supported Virtualization Environments and Microsoft Server Software Support for Windows Azure Virtual Machines

S. “Soma” Somasegar (@SSomasegar) announced Curah! - Curate the web and share what you know on 11/20/2013 (missed when published):
Searching for great technical information is tough – and finding the right place to contribute and show off great content that you’ve either written or discovered is also challenging. With our new content service Curah!, we have a way to make both those tasks easier.
We’ve developed Curah! as a way to help customers discover great technical content. Curah! has a very specific purpose: to help people searching in Bing or Google find annotated collections of great content that specifically target common user questions. We’ve all been there before, typing in a search query and then hunting and clicking through pages of search results wondering where the good stuff is, what’s reputable, what’s appropriate and what’s current. A Curah! curation takes the guesswork out of the process - because it has been hand-selected and annotated by experts. We want customers to think about what they find as the “best of the web” – with descriptions of (and links to) great content that has been curated by others. Our curations are created by others who’ve trod the path to knowledge before them - and learned firsthand about the good resources out there.
Original image replaced by one of my Curah! curations.
So when you are in your search engine, look for Curah! When you do, you’ll know what you’re going to get: a collection of annotated links that can help guide you to the content you need.
If you have content or insights to share, Curah! also invites you to share what you know, which you can easily do at http://curah.com. The Curah! site offers a great opportunity to promote what you know by becoming a curator.
The role of curator is key to the success of Curah! Curators know the problems they’ve tackled in their work, and the content exists on the web that addresses those problems.
Curators know what is authoritative, what is helpful, and what is appropriate for users of varying levels of expertise. Curah! enables them to easily create a set of links and descriptions - and to publish it to the web within seconds.
Curah! is a great way for experts in a particular technology, product, solution, or scenario to share their knowledge.
Namaste!


![]() Curah! (@mscurah) runs on Windows Azure, as noted in the next post. Hopefully, Curah! will have better success than Google’s Knol site, which Google discontinued on 5/1/2012.
Curah! (@mscurah) runs on Windows Azure, as noted in the next post. Hopefully, Curah! will have better success than Google’s Knol site, which Google discontinued on 5/1/2012.
Rod Trent (@rodtrent) posted Curah! the Interview to the Windows IT Pro blog on 11/25/2013:
Last week, Curah! was officially announced and released. Curah! is Microsoft's crowd-sourced console for curating the best technical sources on the web. It seeks to pull in and organize content from blogs, web sites, and documentation to enable IT admins to obtain quick results for locating desired technical help. But, not just that, it also allows IT admins and others to help build the technical library by submitting and managing (curating) their own gold nuggets of found information.
Also last week, I promised an interview with Bryan Franz, who has led the charge in developing the new Microsoft enabled offering. Here's that interview:
Me: You have recently launched Curah!, a “curated answers” solution. Can you give an explanation of what Curah! is intended to do?
Bryan: Curah! is a new content curation service that enables anyone to collect the best links on a given subject and present them along with the curator’s own expert guidance and advice. We all know that there is a lot of great content out there – so much, in fact, that it can take time and resources to piece together information about a specific subject from a sea of information. Curah! makes it easy for experts to share their own personal "views" of the best resources on the web, and for anyone else to find a quick path to the best information on a given subject, curated by experts that they can trust. There are already lots of great ways to post a link to a single great article or video or code sample – Curah! is optimized for building "views" that provide links to multiple great sources of content.
Me: Is Curah! intended to replace any current solutions or just add to the depth of information that Microsoft provides?
Bryan: Curah! is intended to complement current content channels by helping make strong Microsoft and community content more discoverable, and giving it the stamp of approval by Microsoft or community experts. One of the things we would like to do is amplify the visibility and impact of great community and local-market content that people would really value but is sometimes lost in the "noise".
Me: I understand that Curah! is powered by Windows Azure. Can you give an overview of what that looks like?
Bryan: Yes, Curah! is powered by Windows Azure – this has been an important design point since the beginning of the project. Azure helped us prototype and get to production quickly, and it will help us scale as we grow.
Me: How many people were involved in developing Curah!?
Bryan: Curah! was built by a small core team with lots of input from partners and customers.
Me: How many people are currently involved in managing Curah!?
Bryan: In addition to the core development team, we have a small team of international site managers working on the site.
Me: Is the submitted content moderated for Spam and other undesirable information and links?
Bryan: The Curah! site managers review the site for spam and other inappropriate content, and will remove content from the site when it is necessary to do so. We also rely on the community to report Inappropriate content to the site admins, as well as send feedback to curators.
Me: Are there any thoughts around developing Windows and Windows Phone apps for Curah!?
Bryan: Yes, we are interested in making Curah! data available via apps and feeds - these capabilities are being considered for a future update.
Me: Can Curah! content be consumed using Bing and other search engines?
Bryan: Yes, Curah! pages are indexed in Bing and Google – in fact, we expect that in practice that most people will find Curah! content via Bing and Google.
Me: What caused you to settle on the name ‘Curah!’?
Bryan: We wanted to choose a memorable name that evokes the fun of content curation – it is easy and fun to share expertise on the site.
Me: What does the roadmap for Curah! look like?
Bryan: The most important part of the roadmap is to observe how people use the site and make updates that create a better experience. To give a few examples, we think it would be interesting if people could like or vote on pages, and if we could provide curators with ways to see how well their pages are doing with others. This is a site for the community, and we invite feedback from everyone.
Curah! is located at http://curah.microsoft.com/.
To start, just sign-in with a Microsoft Account, submit links you've located and like, add your own take, and publish. Pretty simple.

Lori MacVittie (@lmacvittie) described The Next Cloud Battleground: PaaS in an 11/25/2013 post to the F5 Dev Central blog:
Back in the day - when the Internets were exploding and I was still coding - I worked in enterprise architecture. Enterprise architecture, for the record, is generally not the same as application development. When an organization grows beyond a certain point, it becomes necessary to start designing a common framework upon which applications can be rapidly developed and deployed.
Architects design and implement this framework and application developers then code their applications for deployment on that architecture.
If that sounds a lot like PaaS it should because deep down, it is.
The difference with PaaS is its focus on self-service and operationalization of the platform through automation and orchestration. Traditional enterprise architectures scaled through traditional mechanisms, while PaaS enables a far more fluid and elastic model for scalability and a more service-oriented, API-driven method of management.
A 2012 Engine Yard survey found that it is the operational benefits that are driving interest in PaaS. The "cost-savings" argument typically associated with cloud solutions? A distant third in benefits attributed to this "new" model:
Interestingly, folks seem positively enamored of public models of cloud computing, including PaaS, and are ignoring the ginormous potential within the data center, inside the enterprise walls. It's far less of a leap to get enterprise architects and developers migrating to a PaaS model in the enterprise than it is to get server and network administrators and operators to move to a service-based model for infrastructure. That's because the architects and developers are familiar with the paradigm, they've been "doing it" already and all that's really left is the operationalization of the underlying infrastructure upon which their architectural frameworks (and thus applications) have been deployed.
At the end of the day (or the end of the hype cycle as it were), PaaS is not all that different from what enterprise architects have been building out for years. What they need now is operationalization of the platforms to enable the scalability and reliability of the application infrastructure upon which they've built their frameworks.


Microsoft is counting on growth of PaaS acceptance for the continuing success of Windows Azure.
TheRockyH listed New and Improved features in Windows Azure in an 11/24/2013 post to MSDN’s Enabling Digital Society blog:
We’ve opened up some more features in Windows Azure, including being able to use Windows Azure Active Directory natively from Windows Azure Mobile Services. Check out all the details at ScottGu’s blog. [Link added.]
Traffic Manager: General Availability Release
Active Directory: General Availability Release of Application Access Support
- SSO to every SaaS app we integrate with
- Application access assignment and removal
- User provisioning and de-provisioning support
- Three built-in security reports
- Management portal support
Mobile Services:
- Active Directory Support,
- Xamarin support for iOS and Android with C#,
- Optimistic concurrency :
- Windows Azure Active Directory becomes supported as an identity provider in Mobile Services
- An updated Mobile Services Portable Class Library (PCL) SDK that includes support for both Xamarin.iOS and
Xamarin.Android- New quickstart projects for Xamarin.iOS and Xamarin.Android exposed directly in the Windows Azure Management Portal
- With optimistic concurrency, your application can now detect and resolve conflicting updates submitted by multiple users
- Notification Hubs:
- Price Reduction + Debug Send Support
- easily send test notifications directly from the Windows Azure Management portal
- Web Sites: Diagnostics Support for Automatic Logging to Blob Storage
- Storage: Support for alerting based on storage metrics
- Monitoring: Preview release of Windows Azure Monitoring Service Library
- allows to get monitoring metrics, and programmatically configure alerts and autoscale rules for your services.

Alex Sutton described Remote Direct Memory Access RDMA in Windows Azure in an 11/18/2013 post (missed when published):
Hello from SC13 in Denver. We are excited to be here and talk with you about Big Compute and HPC at Microsoft. Our team is showing demos for Windows Azure and Windows Server with the HPC Pack, and we have partners including GreenButton and Violin Memory also showcasing their solutions in our booth.
Today we are excited to share that Microsoft is joining the steering committee of the InfiniBand® Trade Association (IBTA). The IBTA is a global organization well-known for guiding the InfiniBand™ specification, which provides high-throughput, low-latency communication links commonly used in high performance computing environments. The IBTA has also been involved in creating a specification called RDMA over Converged Ethernet (RoCE), which can achieve similar performances as InfiniBand but over Ethernet.
RDMA (Remote Direct Memory Access) networking enables one computer to place data in the memory of another computer with minimal use of precious CPU cycles, thus enabling very low networking latencies (microseconds) and very high bandwidths (over 40 Gbit/second) - all while using a negligible amount of CPU. To put this in perspective, using RDMA networking one can move the entire content of a typical DVD from the memory of one computer over the network to the memory of another computer in about one second, with almost no involvement from the processors of either computer
As an active member of the IBTA, Microsoft will help drive RDMA specifications and standards to enable performance gains and reduce networking overhead on the CPUs in large, mainstream datacenters. At the moment, Windows Azure has already adopted InfiniBand as the communication technology underpinning the hardware for Big Compute applications. In the future, we aim to bring cutting edge technologies like RoCE more broadly to Windows Azure.
With our RDMA-capable high performance virtual machines, Microsoft enables new classes of workloads to realize the scalability, elasticity, and economic benefits of the cloud. Customers can now leverage Windows Azure to accelerate discovery and insights from scientific modeling, including computational fluid dynamics and finite element analysis, with unprecedented agility, and performance that rivals first-rate on-premises clusters.
<Return to section navigation list>
Windows Azure Pack, Hosting, Hyper-V and Private/Hybrid Clouds
‡‡ Nader Benmessaoud completed his series with Software Defined Networking – Hybrid Clouds using Hyper-V Network Virtualization (Part 3) on 11/27/2013:
Welcome to the last part (3 of 3) of this blog series on Software Defined Networking.
In the previous post we have examined how multi-tenant S2S VPN and NAT provide different modes of connectivity to VMs of different tenants with overlapping IP addresses hosted in Fabrikam network. In this post we will examine how Fabrikam is able to deploy disaster recovery as service using these technologies.
Bring it all Together: Cloud Based Disaster Recovery using Windows Server 2012 R2
Scenario overview:
Fabrikam offers Disaster Recovery as a Service, it allows its tenants to replicate their VMs to Fabrikam data center. If the VMs have to be recovered, they are booted up, connected to the tenant virtual network and assigned IP addresses of the tenant virtual network. Once the VMs are connected to the tenant virtual network they are accessible via VPN (Site to Site & Point to Site) and the VMs can access Internet resources via NAT. Also Fabrikam is able to offer self-service cloud services portal for its customers to be able to consume, configure their Networks, enable direct access to internet, or setup their VPN (S2S & P2S) connectivity to the premises.
We will first examine how Contoso is able to replicate its VMs to Fabrikam and access them “post recovery” over Point to Site VPN using multi-tenant gateway. We will also examine how Woodgrove is able to replicate its VMs from New York site (NY) to Fabrikam. In the case of disaster in NY site, all the critical VMs are restored in Fabrikam and are accessible from San Francisco (SFO) site of Woodgrove.
For Replication we assume Hyper-V Replica feature in Windows server is deployed. This link has details of necessary Hyper-v Replica configuration required on the hosts.
Setting up the Disaster Recovery Infrastructure
Setting up Fabrikam network to allow Disaster Recovery involves the following operations:
- Step 1: Facilitating replication of VMs from different tenants to Fabrikam data center
- Step 2: During recovery of VMs : connecting the VMs to tenant virtual networks
- Step 3: Enabling connectivity of the VMs in tenant network to external networks.
Step 1: Enable Replication of VMs to Fabrikam data center
To enable replication of VMs using Hyper-v Replica, the hosts that are the target of the replication need to be accessible by name from tenant sites. To enable multiple hosts as target of replication, Fabrikam can use an FQDN such as replica.fabrikam.com and route traffic to different hosts based on port number. For instance Fabrikam deploys three host with internal names TenantHost1, TenantHost2 and TenantHost3 mapped to different port numbers. Using a single name allows Fabrikam to scale the service dynamically without making any other infrastructure changes like DNS or acquiring more public IPs. Fabrikam avoids wasting multiple public IPs by deploying NAT and assigning IPs in private address range. The following table illustrates a sample URL to IP to end host mappings:
This approach enables Fabrikam to add new hosts to the cluster of replica servers by just adding entries in NAT.
The above diagram show Woodgrove and Contoso replicating VMs with identical IP address (10.1.0.10) to same host with IP address 192.168.1.81. The host is behind MTGatewayVM with public IP 131.107.0.10. MTGatewayVM performs NAT on incoming packets to send traffic to host 192.168.1.81. The following cmdlet enables NAT on GW-VM:
The last cmdlet adds the necessary NAT mapping so that replica traffic to 131.107.0.10:8001 is translated to IP address 192.168.1.81. To add another replica server Fabrikam admin needs to add just another NAT address like this.
This is the network configuration required on MTGatewayVM so that data path is setup at Fabrikam for tenants to replicate their VMs.
NOTE: To ensure protection of MTGatewayVM, Fabrikam will have to deploy firewall on the device that connects to the Gateway
Step 2: Connecting the VM to tenant virtual networks
Once the initial replication of the VM is complete, the VNIC of the VM is connected to Fabrikam network. To ensure that VM ContosoVM01 is connected to Contoso virtual network, the following cmdlet is executed on TenantHost1:
New-NetVirtualizationLookupRecord -CustomerAddress 10.0.0.10 -VirtualSubnetID 6000 -MACAddress 00155D393301 -ProviderAddress 192.168.1.81 -Rule TranslationMethodEncap
The same cmdlet needs to be executed on all hosts that have Contoso VMs in virtual subnet 6000. After this configuration, whenever Contoso VM is booted up it will be part of Contoso virtual subnet 6000.
NOTE: You can't change replica VM through Virtual Machine Manager (Set-VM is blocked for replica VM in VMM), HNV PowerShell APIs have been used instead in this step. However, It is recommended to use Windows Azure Hyper-V Recovery Manager (HVRM) to help protect your business critical services by coordinating and orchestrating the replication and recovery of Virtual Machines at a secondary location. HVRM provides network pairing and auto attaching the replica VM to the target VM network. This link provides a quick walkthrough of the steps required to deploy Hyper-V Recovery Manager. For more detailed explanations and procedures read the following:
- Planning Guide for Hyper-V Recovery Manager—This guide summarizes the prerequisites and the planning steps you should complete before starting a full deployment of Hyper-V Recovery Manager.
- Deployment Guide for Hyper-V Recovery Manager—This guide provides detailed step-by-step deployment instructions for a full deployment.
Step 3: Enabling external connectivity of VMs
After tenant VMs are replicated and brought up in Fabrikam network, the VMs need to be made accessible to external networks. For businesses like Contoso that have a single office site, in the event of a disaster when their on-prem VMs are not available, their employees will be able to access Contoso VMs by VPN. The steps to enable VPN on MTGatewayVM have been detailed in part 2 of this blog series. To enable Contoso VM with IP address 10.0.0.10 to access Internet servers, NAT needs to be configured on MTGatewayVM. Details of NAT configuration are available in part 2 as well.
As shown in the below diagram, employees of Contoso are able to access Contoso VMs (through Point to Site VPN connection) in spite of their only office in New York not being available.
Now let’s examine how enterprises such a Woodgrove bank are able to utilize Fabrikam services and ensure availability of access to their business critical applications.
In the below diagram, after Woodgrove New York site becomes unavailable, the VMs are brought up in Woodgrove virtual network at Fabrikam. Their VMs come up with the same IP addresses as in New York site. Applications in Woodgrove SFO site access these VMs just as they were accessing them when the VMs were in NY site. With Border Gateway Protocol (BGP), no additional changes are required on Woodgrove SFO site to route traffic to 10.0.0.0/24 via S2S VPN to Fabrikam. This is how it happens:
- When Woodgrove NY site goes down, the route 10.0.0.0/24 that is present over S2S VPN interface to NY site is removed by BGP as peering goes down.
- Once subnet 10.0.0.0/24 route is added in Woodgrove compartment on MTGatewayVM, BGP on Woodgrove SFO router adds route 10.0.0.0/24 on S2S VPN interface to Fabrikam.
Fabrikam also offers its customers self-service, multi-tenant cloud portal to enable them to provision, configure and consume virtual networking infrastructure. The following section details the steps Tenant Administrator should follow to provision their virtual network infrastructure.
Managing Virtual Network Infrastructure using Windows Azure Pack
With Windows Azure pack for Windows Server, Fabrikam offers multi-tenant cloud services portal for its customers to be able to configure their Virtual Networks, enable direct access to internet using NAT, and setup their VPN connectivity (S2S & P2S) to the premises.
In this section we will walk through the steps Tenant admin follows to provision their network services from the Tenant Management Portal.
NOTE: This section does not provide information for deploying and configuring Windows Azure Pack to support VM Clouds scenarios. For more information about the product on this link.
1. After being authenticated, the initial page is shown below. Tenant admin can chooses various services offered by Fabrikam.

2. To create a new VM network, Tenant Admin clicks on “+NEW” option, Select Virtual Network, and Click “Custom Create” option
3. On Selecting “Create Networks” the following web page is shown where the administrator can specify the name of the virtual network and choose between IPv4 or IPv6.

4. On the next page, details of various gateway services offered are provided and administrators can choose the services that need to be configured for the virtual network.
The DNS server address specified here will be configured in the IP Pool options for the tenant virtual network so that VMs in the virtual network are configured with the specified DNS server.
Enabling NAT allows VMs in the virtual network to access Internet resources.
Enabling site-to-site connectivity allows connectivity between VMs in tenant virtual network and tenant premises networks.
Enabling BGP allows tenant routes between tenant premises sites and virtual networks to be exchanged via BGP without need for manual route configuration.
The gateway subnet is the subnet of the tenant compartment on gateway VM. Contoso administrator should ensure that this subnet does not overlap with any other IP subnet in any of the sites of Contoso. The VSID interface in the tenant compartment is assigned the IP address from the second IP of the subnet. Based on the parameters provided on the above screen, the VSID interface will be assigned IP address 10.254.254.2. IP address 10.254.254.1 is reserved for HNV distributed router. All the traffic to subnets that are not present in the virtual network for the tenant are routed to 10.254.254.1. HNV distributed router then routes all the traffic to 10.254.254.2 and the packets land up in the tenant compartment on the gateway. From the tenant compartment if a matching route is found on any of the interfaces, traffic is forwarded on that interface. Otherwise the traffic is NAT’ed (assuming there is a matching route in the default compartment). If a matching route is found on S2S interface in tenant compartment, the traffic is forwarded securely to the corresponding tenant site via S2S VPN.5. Next the tenant administrator needs to specify the address space for its virtual network.
6. The next page allows to specify details of the Site to Site VPN:
The Name of the connection is used to create the S2S interface on the gateway.
VPN Device IP address is the address of the VPN device at tenant premises. This address is configured as the destination address on S2S interface.
Shared Key is the key used for authentication of S2S connection.
All the static routes that need to be added on S2S interface need to be specified. If BGP is not enabled all the routes of the enterprise premises need to be specified here. If BGP is enabled, the subnet to which the BGP peer in the enterprise belongs to needs to be specified.
7. The next page in the wizard allows the administrator to specify BGP parameters
The Contoso virtual network in Fabrikam needs to be assigned an ASN number. For each of the BGP peers in Tenant premises, their IP address and ANS numbers have to be specified. The BGP router in Tenant compartment tries to peer with each of the specified on-premises peers.
8. After successfully provisioning the virtual network the below page is shown.
9. After creating the virtual networks through the mentioned flow, the tenant can specify additional parameters by clicking on the virtual network in the above page. The below page allows the administrator to specify more options. As shown in the page, Tenant administrator can download VPN scripts to configure his premises VPN devices.
10. On selecting “Rules” tab, NAT rules are displayed. On selecting “Site-To-Site VPN” the page with all configured S2S VPN connections is displayed. Tenant administrator can select a specific VPN connection and click edit to modify parameters of VPN connection. The IP addresses of the VPN device in enterprise premises can be modified in the below page.
11. The next pages allow updating the Routes within the network behind the VPN device, also specifying bandwidth limits in each direction for the selected Site-to-Site VPN interface.
That’s it!
In this post we have seen how the following technologies introduced in Windows Server 2012 R2 enable cloud service providers like Fabrikam to provide at scale disaster recovery as a service to enterprise and small and medium business:
- Hyper-V Network Virtualization
- Hyper-V Replica
- Multi-tenant TCP/IP stack
- Multi-tenant NAT
- Multi-tenant S2S VPN
- Multi-tenant Remote Access VPN
- Multi-tenant BGP
I hope this Blog post series have provided you with helpful overview of the SDN solution, specifically Hyper-V Network Virtualization. Thanks for taking a look!
Also I would like to thank my colleagues Uma Mahesh Mudigonda and CJ Williams for providing inputs.


‡ Rod Trent (@rodtrent) reported New Microsoft Press eBook Covers a Little Known System Center App: App Controller in an 11/27/2013 article for the Windows IT Pro blog:
System Center App Controller is probably the least known, least used, and least talked about application in the entire System Center 2012 Suite. So, it's good to see Microsoft investing resources in created a book that will hopefully explain the application and draw a bit more interest in its use.
In case you don't know already, App Controller is an extension of Virtual Machine Manager (VMM) that gives VMM a web-based interface for deploying virtual machines (VMs) and services. App Controller connects to both local and public Clouds, allowing VMs to be deployed across both Private and Public Clouds. App Controller works with local resources, Windows Azure, and also 3rd party datacenter hosting providers, so it offers a true Hybrid Cloud model for deploying highly mobile VMs.
Microsoft has released a new, free eBook called: Microsoft System Center: Cloud Management with App Controller, that seeks to educate the public on this oft overlooked application. The eBook comes in at a little over 100 pages of actual content and covers the following topics:
- Chapter 1: App Controller Essentials
- Chapter 2: Managing private clouds
- Chapter 3: Managing public clouds
- Chapter 4: Managing hybrid clouds
- Chapter 5: App Controller cmdlets (PowerShell)
You can grab the free eBook (PDF format) here: Microsoft System Center: Cloud Management with App Controller


Anders Ravnholt started a series with Troubleshooting Windows Azure Pack & Gallery Items (VM Roles) (Part 1) on 11/24/2013:
Today we are going to look at another new area which came to market with Windows Azure Pack (WAP) and System Center 2012 R2. The new concept is called Gallery Items and is a new way to distribute applications and workloads (e.g PaaS apps, VM Templates) using Windows Azure Pack and Virtual Machine Manager 2012 R2.
As with previous blog posts I’m going to split this into two parts:
- Short Introduction to Gallery Items and concepts before troubleshooting (Part 1, this blog post)
- Troubleshooting items for Windows Azure Pack and Gallery Items (Part 2)
Introduction to Gallery Items
Gallery Items (Virtual Machine Role Templates) provide a consistent service model amongst Windows Server, System Center and Windows Azure for composing, deploying and scaling virtualized applications and workloads.
This allows you to deploy Microsoft and 3rd party workloads like
- SharePoint
- Domain Controller
- SQL Server
- Word Press
- Oracle Self-Service Kit (here)
- CentOS6 LAMP
Gallery Items require Windows Azure Pack, Service Provider Foundation and Virtual Machine Manager to provision these VM Roles to a Cloud
Gallery Items can be offered via Plans in Windows Azure Pack and can be distributed to Clouds using the WAP Tenant Portal.
Gallery Item Definitions:
You should familiarize yourself with these definitions before starting:

<Return to section navigation list>
Visual Studio LightSwitch and Entity Framework 4.1+
‡ Beth Massi (@bethmassi) continued her series with Beginning LightSwitch in VS 2013 Part 4: Too much information! Sorting and Filtering Data with Queries on 11/27/2013:
NOTE: This is the Visual Studio 2013 update of the popular Beginning LightSwitch article series. For previous versions see:
Visual Studio 2012: Part 4: Too much information! Sorting and Filtering Data with Queries
- Visual Studio 2010: Part 4: Too much information! Sorting and Filtering Data with Queries
Welcome to Part 3 of the Beginning LightSwitch in Visual Studio 2013 series! In part 1, 2 and 3 we learned about entities, relationships and screens in Visual Studio LightSwitch. If you missed them:
- Part 1: What’s in a Table? Describing Your Data
- Part 2: Feel the Love - Defining Data Relationships
- Part 3: Screen Templates, Which One Do I Choose?
In this post I want to talk about queries. In real life a query is just a question. But when we talk about queries in the context of databases, we are referring to a query language used to request particular subsets of data from our database. You use queries to help users find the information they are looking for and focus them on the data needed for the task at hand. As your data grows, queries become extremely necessary to keep your application productive for users. Instead of searching an entire table one page at a time for the information you want, you use queries to narrow down the results to a manageable list. For example, if you want to know how many contacts live in California, you create a query that looks at the list of Contacts and checks the State in their Address.
If you’ve been following this article series, you actually already know how to execute queries in LightSwitch. In part 3 we built a specific search for our Browse Contacts Screen. This allows the user to search for contacts by first or last name. In this post I want to show you how you can define your own reusable queries using the Query Designer and how you can use them across your application.
The LightSwitch Query Designer
The Query Designer helps you construct queries sent to the backend data source in order to retrieve the entities you want. You use the designer to create filter conditions and specify sorting options. A query in LightSwitch is based on an entity in your data model (for example, a Contact entity). A query can also be based on other queries so they can be built-up easily. For instance, if you define a query called SortedContacts that sorts Contacts by their LastName property, you can then use this query as the source of other queries that return Contacts. This avoids having to repeat filter and/or sort conditions that you may want to apply on every query.
For a tour of the Query Designer, see Queries: Retrieving Information from a Data Source
For a video demonstration on how to use the Query Designer, see: How Do I: Filter Data on a Screen in the LightSwitch HTML Client?
Creating a “SortedContacts” Query
Let’s walk through some concrete examples of creating queries in LightSwitch using the Contact Manager Address Book application we’ve been building. In part 3 we built a screen query for our Contacts that sorts by FirstName and LastName. However, this query is specific to the Browse Contacts screen. What if we wanted to reuse the query in other parts of our application? Instead of modifying the query directly on the screen, you can use the Query Designer to define global queries related to your entities instead.
To create a global query, in the Solution Explorer right-click on the entity you want to base it on (in our case Contacts) and choose “Add Query”.
The Query Designer will open and the first thing you do is name your query. We’ll name ours “SortedContacts”. Once you do this, you will see the query listed under the entity in the Solution Explorer.
Next we need to define the sort order so click “+Add Sort” in the Sort section of the designer then select the FirstName property from the drop down. Click “+Add Sort” again and this time select the LastName property. Leave the order Ascending for both.
Now that we have this query that sorts our contacts, we can use it as basis of other contact queries so that if we ever want to change the sort order, all the queries based on this will update the sort. For instance, now we can create another query based on SortedContacts that applies a Filter condition.
But before we jump into Filter conditions and Parameters, notice how the SortedContacts now shows up as a choice for screen data when selecting a Browse Data Screen. Global queries show up this way.
Keep in mind you won’t see queries that return sets of data for screen templates that work with individual records like the View and Add/Edit Details screen templates.
Defining Filter Conditions and Parameters
What if we wanted to allow the user to find contacts who’s birth date falls within a specific range? Let’s create a query that filters by date range but this time we will specify the Source of the query be the SortedContacts query. Right-click on the Contacts entity and choose “Add Query” to open the Query Designer again. Name the query “ContactsByBirthDate” and then select “SortedContacts” in the Source drop down on the top right of the designer.
Now the query is sorted but we need to add a filter condition. Defining filter conditions can take some practice (like designing a good data model) but LightSwitch tries to make it as easy as possible while still remaining powerful. You can specify fairly complex conditions and groupings in your filter, however the one we need to define isn’t too complex. When you need to find records within a range of values you will need 2 conditions. Once that checks records fall “above” the minimum value and one that checks records fall “below” the maximum value.
So in the Query Designer, click “+ Add Filter” and specify the condition like so:
Where
the BirthDate property
is greater than or equal to
a parameter.
Then select “Add New” to add a new parameter.
The parameter’s name will default to “BirthDate” so change it to MinimumBirthDate down in the Parameters section.
Similarly, add the filter condition for “Where the BirthDate property is less than or equal to a new parameter called MaximumBirthDate”. The Query Designer should now look like this:
One last thing we want to think about with respect to parameters is whether they should be required or not. Meaning must the user fill out the filter criteria parameters in order to execute the query? In this case, I don’t want to force the user to enter either one so we want to make them optional. You do that by selecting the parameter and checking “Is Optional” in the properties window.
Okay now let’s use this query for our Browse Screen. Instead of creating a new screen and selecting this global query, we can change the current query we’re using on the Browse Contacts screen we created in Part 3. Open the screen, select the Contacts query on the left, then change the Query Source to Contacts By Birthdate. LightSwitch will only let us select from queries that return contacts, or the entity itself.
Once we do this you will see the parameters we need automatically added to the screen’s view model and bound to the new query’s parameters (indicated by a grey arrow). Delete the previous screen parameter (FindContact) from the view model, drag the new parameters onto the screen where you want them, and then change the controls to Date Picker controls. I also added the BirthDate field into the List and changed the List control to a Tile List.
Hit F5 to build and run the application. Notice the contacts are still sorted in alphabetical order on our browse screen but you see fields at the top of the screen that let us specify the birth date range. Since both of these parameters are optional, users can enter none, one, or both dates and the query will automatically execute correctly based on that criteria.
Quick tip for small form factors (or you have a lot of optional parameters). If most of your users will be using smaller devices like mobile phones, you probably want to conserve precious space on the screen. Or maybe you want a separate screen if you have a lot of optional parameters. Instead of putting the parameter fields above the list, we can put them in a popup instead. While the app is running in debug, flip to the screen designer. Add a Popup by clicking on the Popups node, name it “Filter” in the properties window and then drag the parameters into it.
Then add a button into the Command Bar that shows the Popup (this will be automatically selected, so just click OK on the Add Button dialog).
You can also set the icon of the newly added “Show Filter” button to a Filter icon using the properties window. When you’re done tweaking the screen designer, save all your files and then refresh your browser. You will now see a button in the command bar for filtering contacts. (Also notice that the Tile List will display as a normal List on smaller form factors.)
As you can see using queries with parameters like this allows you to perform specialized searches. When creating new screens with queries as the basis of screen data, LightSwitch will automatically look at the query’s parameters and create the corresponding screen parameters and controls. If you’re changing queries on existing screens, LightSwitch will create the corresponding screen parameters bound to the query parameters for you in your view model. Either way, you can display them exactly how you want to the user using the screen designer.
Querying Related Entities
Before we wrap this up I want to touch on one more type of query. What if we wanted to allow the user to search Contacts by phone number? If you recall our data is modeled so that Contacts can have many Phone Numbers so they are stored in a separate related table. In order to query these using the Query Designer, we need to base the query on the PhoneNumber entity, not Contact.
So right-click on the PhoneNumbers entity in the Solution Explorer and select “Add Query”. I’ll name it ContactsByPhone. Besides searching on the PhoneNumber I also want to allow users to search on the Contact’s LastName and FirstName. This is easy to do because the Query Designer will allow you to create conditions that filter on related parent tables, in this case the Contact. When you select the property, you can expand the Contact node and get at all the properties.
So in the Query Designer, click “+ Add Filter” and specify the condition like so:
Where the Contact’s LastName property
contains
a parameter
Then select “Add New” to add a new parameter.
The parameter’s name will default to “LastName” so change it to FindContact down in the Parameters section and make it optional by checking “Is Optional” in the properties window.
We’re going to use the same parameter for the rest of our conditions. This will allow the user to type their search criteria in one textbox and the query will search across all three fields for a match. So the next filter condition will be:
Or the Contact’s FirstName property contains the parameter of FindContact
And finally add the last filter condition:
Or the Phone property contains the parameter of FindContact. I’ll also add a Sort on the Contact.FirstName then by Contact.LastName then by Phone Ascending. The Query Designer should now look like this:
Now it’s time to create a Browse Screen for this query. Instead of deleting the other Browse screen that filters by birth date range, I’m going to create another new screen for this query. Another option would be to add the previous date range condition to this query, which would create a more complex query but would allow us to have one search screen that does it all. For this example let’s keep it simple, but here’s a hint on how you would construct the query by using a group:
Not only is complex grouping options supported, but you can also drop down the “Write Code” button at the top of the designer and write your own queries using LINQ. For more information on writing complex queries see: Queries: Retrieving Information from a Data Source and How to Create Composed and Scalar Queries
So to add the new Browse Screen right-click on the Screens node again and select “Add Screen…” to open the Add New Screen dialog. Select the Browse Data Screen template and for the Screen Data select the ContactsByPhone query and click OK.
Next make the screen look how we want. I’ll change the List control to a Tile List and remove all the fields except Contact, Phone and Phone Type. Change the Contact control to a Columns Layout and delete all the fields except FirstName & LastName. I’ll also make the Phone Type’s Font Style smaller in the properties window. Then change the “PhoneNumerFindContact” screen parameter to a TextBox, and set the Label Position to None and enter the Placeholder text "Find Contact”. The screen should look like this:
Next let’s hook up our tap behavior and Add button so we can add new contacts and view existing ones from this screen. Select the Command bar, Add a button and select the existing method showAddEditContact and set the Contact to (New Contact). Click OK.
Change the button name to just “Add Contact” and set the Icon to “Add” using the properties window. Next select the Tile List and set the Tap action in the properties window. Select the existing method showViewContact and then set the Contact to ContactsByPhone.selectedItem.Contact. Click OK.
Finally, right-click on the Screens node in the Solution Explorer and select “Edit Screen Navigation”. Now that we have two Browse Screens, we can choose between them in our app by adding them to the global navigation. For more information on screen navigation see: New Navigation Features in LightSwitch HTML Client
You can also right-click on this screen in the Solution Explorer and set it as the Home screen so it will open first.
Okay hit F5 and let’s see what we get. Now users can search for contacts by name or by phone number. When you click on the Contact tile, the View Details screen we created in part 3 will open automatically.
Wrap Up
As you can see queries help narrow down the amount of data to just the information users need to get the task done. LightSwitch provides a simple, easy-to-use Query Designer that lets you base queries on entities as well as other queries. And the LightSwitch Screen Designer does all the heavy lifting for you when you base a screen on a query that uses parameters.
Writing good queries takes practice so I encourage you to work through the resources provided in the Working with Queries section on the LightSwitch Developer Center.
In the next post we’ll look at user permissions. Until next time!


Kevin Mehlhaff described Customizing the Table Control: Sortable by Column in an 11/26/2013 post to the Visual Studio LightSwitch Team blog:
The Table control is a new way to display a collection of data in the LightSwitch HTML Client as of Visual Studio 2013. Like all controls in the LightSwitch HTML client, you can take over the rendering and write your own custom code. Today we will be leveraging the power of the LightSwitch middle tier and the flexibility of HTML to make one such customization. We will be adding sortable column headers to the table so that the user of the application can choose to sort by a particular field. This makes it easy for the user to find the data he or she is looking for.
Adding Custom Query
First we will create a new LightSwitch HTML application. For this example, attach to an external data source, choose the Northwind OData feed at http://services.odata.org/Northwind/Northwind.svc and import the Customer entity.
Then add a new server query on the Customers table, named SortedCustomers.
Next add two new parameters to the query, SortPropertyName, of type String, and SortAscending of type Boolean:
Then select Write Code to edit the SortedCustomers_PreprocessQuery method:
In order to sort by a dynamic property name we will need to build up the LINQ query programmatically. Create two Extension methods on the IQueryable interface in order to do this. Add the following class before the NorthwindEntitiesDataService class definition:
VB:
Module OrderByExtensions

    Private ReadOnly OrderByMethod As MethodInfo =
        GetType(Queryable).GetMethods().
        Where(Function(method) method.Name = "OrderBy").Where(Function(method)
        method.GetParameters().Length = 2).[Single]()

    Private ReadOnly OrderByDescendingMethod As MethodInfo =
        GetType(Queryable).GetMethods().
        Where(Function(method) method.Name = "OrderByDescending").
        Where(Function(method) method.GetParameters().Length = 2).[Single]()

    Private Function GetOrderByMethodForProperty(Of TSource)(source As IQueryable(Of TSource),
                                                 propertyName As String,
                                                 orderByMethod As MethodInfo)
                                                 As IQueryable(Of TSource)
        ' Create a parameter "x", where x is of TSource type
        Dim parameter As ParameterExpression = Expression.Parameter(GetType(TSource), "x")
        ' Access a property on the parameter: "x.<propertyName>"
        Dim parameterProperty As Expression = Expression.[Property](parameter, propertyName)
        ' Create a lambda of the form "x => x.<propertyName>"
        Dim lambda As LambdaExpression = Expression.Lambda(parameterProperty, {parameter})
        Dim orderByMethodTyped As MethodInfo =
            orderByMethod.MakeGenericMethod({GetType(TSource), parameterProperty.Type})
        Dim retVal = orderByMethodTyped.Invoke(Nothing, New Object() {source, lambda})

        Return DirectCast(retVal, IQueryable(Of TSource))
    End Function

    <System.Runtime.CompilerServices.Extension>
    Public Function OrderByPropertyName(Of TSource)(source As IQueryable(Of TSource),
                                                    propertyName As String)
                                                    As IQueryable(Of TSource)

        Return GetOrderByMethodForProperty(Of TSource)(source, propertyName, OrderByMethod)
    End Function

    <System.Runtime.CompilerServices.Extension>
    Public Function OrderByPropertyNameDescending(Of TSource)(source As IQueryable(Of TSource),
                                                              propertyName As String)
                                                              As IQueryable(Of TSource)
        Return GetOrderByMethodForProperty(Of TSource)(source,
                                                       propertyName,
                                                       OrderByDescendingMethod)
    End Function
End Module
C#:
public static class OrderByExtensions
    {
        private static readonly MethodInfo OrderByMethod =
            typeof(Queryable).GetMethods()
            .Where(method => method.Name == "OrderBy")
            .Where(method => method.GetParameters().Length == 2)
            .Single();

        private static readonly MethodInfo OrderByDescendingMethod =
            typeof(Queryable).GetMethods()
            .Where(method => method.Name == "OrderByDescending")
            .Where(method => method.GetParameters().Length == 2)
            .Single();

        private static IQueryable<TSource> GetOrderByMethodForProperty<TSource>
            (IQueryable<TSource> source, string propertyName, MethodInfo orderByMethod)
        {
            // Create a parameter "x", where x is of TSource type
            ParameterExpression parameter = Expression.Parameter(typeof(TSource), "x");
            // Access a property on the parameter: "x.<propertyName>"
            Expression parameterProperty = Expression.Property(parameter, propertyName);
            // Create a lambda of the form "x => x.<propertyName>"
            LambdaExpression lambda = Expression.Lambda(parameterProperty, new[] { parameter });
            MethodInfo orderByMethodTyped = orderByMethod.MakeGenericMethod
                (new[] { typeof(TSource), parameterProperty.Type });
            object retVal = orderByMethodTyped.Invoke(null, new object[] { source, lambda });
            return (IQueryable<TSource>)retVal;
        }
        public static IQueryable<TSource> OrderByPropertyName<TSource>
            (this IQueryable<TSource> source, string propertyName)
        {
            return GetOrderByMethodForProperty<TSource>(source, propertyName, OrderByMethod);
        }

        public static IQueryable<TSource> OrderByPropertyNameDescending<TSource>
          (this IQueryable<TSource> source, string propertyName)
        {
            return GetOrderByMethodForProperty<TSource>(source,
                                                        propertyName,
                                                        OrderByDescendingMethod);
        }
    }
We will also need to add two using statements at the top of the file.
VB:
Imports System.Reflection
Imports System.Linq.Expressions
C#:
using System.Reflection;
using System.Linq.Expressions;
Once we have these extension methods, we can use them in the SortedCustomers_PreprocessQuery method:
VB:
Private Sub SortedCustomers_PreprocessQuery(SortPropertyName As String,
        SortAscending As System.Nullable(Of Boolean),
        ByRef query As System.Linq.IQueryable(Of LightSwitchApplication.Customer))

    If Not String.IsNullOrEmpty(SortPropertyName) Then
        If (Not SortAscending.HasValue OrElse SortAscending.Value) Then
            query = query.OrderByPropertyName(SortPropertyName)
        Else
            query = query.OrderByPropertyNameDescending(SortPropertyName)
        End If
    End If
End Sub
C#:
 partial void SortedCustomers_PreprocessQuery(string SortPropertyName,
            bool? SortAscending,
            ref IQueryable<Customer> query)
        {
            if (!String.IsNullOrEmpty(SortPropertyName))
            {
                if (!SortAscending.HasValue || SortAscending.Value)
                    query = query.OrderByPropertyName(SortPropertyName);
                else
                    query = query.OrderByPropertyNameDescending(SortPropertyName);
            }

        }
Adding Functionality to the Table Control
Now that we have a query that can handle sorting based on the name of a property, add a screen. Add a Browse Screen and select the SortedCustomers query as the data source:
Click OK to create the screen. Notice that in the Data Members List on the left two screen properties have been automatically added from the template. The first, CustomerSortPropertyName, is bound to the SortPropertyName parameter on the SortedCustomers query while the second, CustomerSortAscending, is bound to the SortAscending query parameter. These screen properties are automatically added to the screen in the Screen Content Tree. We will refer to these properties in custom code later but we do not need these on the screen, so select them from the tree and delete:
Now change the collection type of Sorted Customers on the screen from a List to a Table control:
Edit the postRender method for the Table by selecting the Table on the screen and clicking the Write Code dropdown:
Since everything in JavaScript is an object, give a name, CustomerPostRender, to the postRender function so we can reference it later. In this case we will use it to store static variables that retain their values between calls to the function. Add the following code to the function:
// Give a name, CustomerPostRender, to this function so
// that we can use it to store static variables
myapp.BrowseSortedCustomers.Customer_postRender =
    function CustomerPostRender(element, contentItem) {
    // Write code here.
    if (CustomerPostRender.ascending == undefined) {
        CustomerPostRender.ascending =
            contentItem.screen.CustomerSortAscending != undefined ?
            contentItem.screen.CustomerSortAscending : true;
    }

    $("th", $(element)).each(function (i) {
        // Get the column header contentItem based on the index
        var headerContentItem = contentItem.children[0].children[i];

        // Some columns might contain contentItems that do not directly display the value
        // of a sortable property. For example, a column could contain a navigation property
        // (navigation properties are not order comparable) or a column could contain a
        // button. We skip adding an onclick handler in these cases.
        if (headerContentItem.kind !== "Value") {
            return;
        }

        var propertyName = headerContentItem.name;

        // Add a click handler for each table header
        $(this).on("click", function () {
            var text = $(this).text();
            // The same column has been clicked twice, so reverse the sort order.
            if (CustomerPostRender.lastColumnClicked == this) {
                text = $(CustomerPostRender.lastColumnClicked).data("originalText");
                CustomerPostRender.ascending = !CustomerPostRender.ascending;
            } else {
                // A different table header was clicked than the previous one
                if (CustomerPostRender.lastColumnClicked != undefined) {
                    // Reset the last table header to remove the sort graphic
                    $(CustomerPostRender.lastColumnClicked).html(
                        $(CustomerPostRender.lastColumnClicked).data("originalText"));
                }
            }
            applySortGraphic(this, text, CustomerPostRender.ascending);
            contentItem.screen.CustomerSortPropertyName = propertyName;
            contentItem.screen.CustomerSortAscending = CustomerPostRender.ascending;
            // Store the original text of the table header by using the JQuery data api
            $(this).data("originalText", text);
            CustomerPostRender.lastColumnClicked = this;
        });

        // Set the column that is sorted initially
        if (propertyName == contentItem.screen.CustomerSortPropertyName) {
            $(this).data("originalText", $(this).text());
            CustomerPostRender.lastColumnClicked = this;
            applySortGraphic(this, $(this).text(), CustomerPostRender.ascending);
        }
    });
};
Add an additional function to the code-behind file to apply the sort graphic. Here we are just using HTML entities to make it easy to display an up triangle or a down triangle:
function applySortGraphic(element, text, ascending) {
    // Use html entity for up triangle and down triangle respectively
    var graphic = ascending ? "▲" : "▼";
    $(element).html(text + " " + graphic);
}
To sort by a default property and direction we can edit the screen’s created entry point to set default values. Go back to the screen designer and select the created entry in the Write Code drop down:
Add the following code to set the table to initially sort by the ContactName property in the ascending direction:
myapp.BrowseSortedCustomers.created = function (screen) {
    screen.CustomerSortAscending = true;
    screen.CustomerSortPropertyName = "ContactName";
};
Now if we F5, we see the browse screen that is initially sorted by the Customer’s ContactName property. Clicking a different column header will sort by that column while clicking the same column header twice will reverse the sort direction.
Conclusion
Using the flexibility of HTML and the LightSwitch middle tier, we were quickly able to add additional functionality on top of the existing Table control. All we had to do was create a custom server query that could sort on a property name and then create a basic UI on top of the column headers.


 No significant Entity Framework articles so far this week.
<Return to section navigation list>
Cloud Security, Compliance and Governance
Paul Korzeniowski wrote Amid security concerns, cloud insurance makes headway in the enterprise for SearchCloudComputing.com in October, 2013 (missed when published):
As cloud computing extends into more enterprises, businesses are searching for ways to mitigate potential risk. Companies have become adept at examining their providers' business processes and determining how robust they are, but data shows they remain concerned about cloud security and its reliability. Recently, businesses have been taking out cloud insurance to protect themselves from possible losses. Though these insurance policies are emerging, they are hitting roadblocks to full success in the marketplace.
For more than a decade, insurance companies have offered corporations plans to cover various types of IT outages: privacy breaches, lawsuits and lost business opportunities from system downtime. In 2011, the U.S. Securities and Exchange Commission issued a decree asking domestic firms to provide shareholders with disclosures about possible IT exposure as well as steps to remediate any losses.
The IT policies have been lumped in a bucket dubbed "cyber insurance," but whether they cover cloud failures is unclear.
"Cyber insurance policies were designed for premises-based systems," said Doug Weeden, director of program administration at CyberRiskPartners LLC's CloudInsure. Consequently, some cyber liability policies exclude losses incurred by a third party, such as a cloud provider, but others include clauses that protect the client regardless of where the data is stored. So, businesses need to closely examine their policies to see if cloud coverage is included.
While interest in such policies has grown, it remains largely a work in progress. Most companies do not carry insurance for cloud or other IT breaches, according to a survey by Willis Group Holdings, a global risk advisory, insurance and reinsurance broker. As for cyber insurance protection, the funds sector of companies reported the greatest levels of insurance at 33%, followed by utilities companies at 15% and the banking sector and conglomerates at 14%. Insurance and technology sectors both disclosed the purchase of IT insurance coverage at 11% of companies -- but most companies have no coverage.
However, growing maturity and interest in this market could signal a change for cloud insurance. "Five years ago, there were a dozen cyber insurance suppliers; now there are more than 70," said Tom Srail, senior vice president for the technology practice at Willis. For instance, Chubb Group of Insurance Companies entered the cyber insurance market in August 2013.
The current low penetration rate of cloud-specific insurance and the emerging need may attract more new market entrants such as CloudInsure, which was founded in 2010. In addition, the MSPAlliance, an association of service providers that in 2013 partnered with broker Lockton Affinity LLC to provide cloud insurance. In June, insurance provider Liberty Mutual began offering cloud insurance policies as part of a partnership with CloudInsure. …


Read the rest of this article here.
Full disclosure: I’m a contributor to TechTarget’s SearchCloudComputing.com. Click here for a list of my articles.
<Return to section navigation list>
Cloud Computing Events
‡ Cameron Rogers reported on 11/27/2013 an #AzureChat - AutoScale and Virtual Machines on 12/9/2013 at 9:00 AM PST:
We’re excited for our next #AzureChat, a Twitter Chat brought to you by the @WindowsAzure team!
#AzureChat focuses on different aspects of cloud computing and best practices when developing for the cloud. Want to learn more about a specific cloud service? Looking to hear about tips and tricks, developer trends and best practices? #AzureChat is the place to join, share your thoughts and hear from Microsoft experts and fellow devs in the community.
On Thursday, December 5th at 9:00 am PST, we’ll host a live Q&A discussion focused on autoscaling with Corey Sanders and Stephen Siciliano. Corey and Stephen work on the Virtual Machines and Autoscale teams (respectively). When you bring these two things together, you get a scalable and cost-effective system in which you can deploy your workload. Stephen and Corey will answer any questions you have around scaling and running Virtual Machines in Windows Azure. They will also cover some of the latest announcements, including the new SDK available for autoscaling. We encourage you to submit your questions in advance to @WindowsAzure.
How #AzureChat works:
- An optional tweet chat “room” is available for you to monitor and participate in the conversation
- You can also use Hootsuite, Tweetdeck, or any other Twitter client. You’ll just need to set up a column hashtag #AzureChat.
- Join us at 9:00am PST on Thursday, December 5th for the kick-off of the chat. (You can join in any time during the 30 minute chat if you are running late).
- @WindowsAzure will ask a series of questions, each beginning with “Q1,” “Q2,” and so on.
- @CoreySandersWA and @iscsus will respond using “A1”, “A2”, and so on.
- We want your thoughts! If you’d like to answer a question, just tweet back with “A1,” “A2,” etc. to the corresponding question
Sound like something you’d like to check out? Join us this Thursday, December 5th at 9:00 am PST.
‡ Scott Guthrie (@scottgu) described Presentations I’m doing in Dublin and London Dec 2nd->5th in an 11/26/2013 post:
I’ll be in Ireland and the UK next week presenting at several events. Below are details on the talks I’ll be doing if you want to come along and hear them:
Dublin: Monday Dec 2nd
I’m doing two separate free events in Dublin on Monday:
- Windows Azure and the Cloud at Mon 1-3pm. This event is free to attend, and I’ll be doing a two hour keynote/overview session on Windows Azure as part of it. This will be a great talk to attend if you are new to Windows Azure and are interested in learning more about what you can do with it. Later sessions at the event also cover VS 2013, building iOS/Android apps with C# using Xamarin, and F# with Data and the Cloud. Lean more here and sign-up for free.
- Building Real World Application using Windows Azure at Mon 6:00-9:00pm. This event is also free to attend, and during it I’ll walkthrough building a real world application using Windows Azure and discuss patterns and best practice techniques for building real world apps along the way. The content is intermediate/advanced level (my goal is to melt your brain by the end) but doesn’t assume prior knowledge of Windows Azure. Learn more here and sign-up for free.
There is no content overlap between the two talks – so feel free to attend both if you want to!
London: Wed Dec 4th and 5th
I’m presenting at the NDC London Conference on Dec 4th and Dec 5th as well. This is a great developer conference being hosted in the UK for the first time. It has a great line up of speakers attending.
I’m presenting 2 separate two-part talks:
- Introduction to Windows Azure (Part 1 and 2) at Wed from 1:30-4pm. This will be a great talk to attend if you are new to Windows Azure and are interested in learning more about what you can do with it.
- Building Real World Applications using Windows Azure (Part 1 and 2) at Thursday from 9am-11:20am. I’ll walkthrough building a real world application using Windows Azure and discuss patterns and best practice techniques for building real world apps along the way. The content is intermediate/advanced level (my goal is to melt your brain by the end) but doesn’t assume prior knowledge of Windows Azure.
Hope to see some of you there!

‡ Scott Hanselman (@shanselman) announced a Windows Azure Friday series:
Trusted voices at the center of the Enterprise and Cloud computing.
I learn best when a trusted friend sits down with me and we pair on a problem. Just two engineers, a laptop and the cloud, solving problems. I'm trying to bring that experience to you every Friday. No editing, no marketing, just solutions. -- Scott Hanselman

From the previous episodes:
Deploying from a Branch with Kudu - with David Ebbo
David and Scott setup a branching system to deploy their web site from a specific Git Branch.
SERVICESWeb Sites Posted: 11-22-2013
10 min, 14 secCustom Web Site Deployment Scripts with Kudu - with David Ebbo
Kudu can be extended to run Unit Tests and much more more using Custom Deployment Scripts. How far can David and Scott take it?
What is Kudu? - Azure Web Sites Deployment with David Ebbo
David Ebbo explains the Kudu deployment system to Scott. How does Kudu use Git to deploy Azure Web Sites from many sources?
Erich Gamma introduces us to Visual Studio Online integrated with the Windows Azure Portal - Part 1
Scott talks to Erich Gamma about how a rich JavaScript-based editor codenamed "Monaco" integrates with Windows Azure and Visual Studio Online.
Posted: 11-15-2013
15 min, 20 secErich Gamma introduces us to Visual Studio Online integrated with the Windows Azure Portal - Part 2
Erich digs into how the Visual Studio rich editing experience codenamed Monaco uses TypeScript compiled to JavaScript in the browser to deliver type information in a whole new class of application. He also shares the architecture of the new system and how it relates to "Kudu."
Erich Gamma introduces us to Visual Studio Online integrated with the Windows Azure Portal - Part 3
Erich and Scott continue their exploration of the codenamed "Monaco" editor and the Visual Studio Online experience, editing and deploying node apps and C# apps to Azure via Git.
SERVICESWeb Sites
Posted: 11-08-2013
06 min, 16 sec
Custom configuration and application settings in Azure Web Sites - with Stefan Schackow
Scott and Stefan explore how Application Settings work with Azure. What settings go in your web.config and which don't? How does Azure override settings and why is this useful?
Posted: 11-08-2013
05 min, 41 secHow does SSL work in an Azure Web Sites
When you want to setup SSL on your Azure Web Site, what are you options? Stefan explains IP-based and SNI-based SSL with Azure Web Sites
Posted: 11-01-2013
09 min, 00 secMoving Apps to the Azure: What changes? - with Stefan Schackow
Stefan shares some important details than are often forgotten when moving your site to the cloud. What do you own in the Web Sites file system, and what do you not? When is file system access OK?
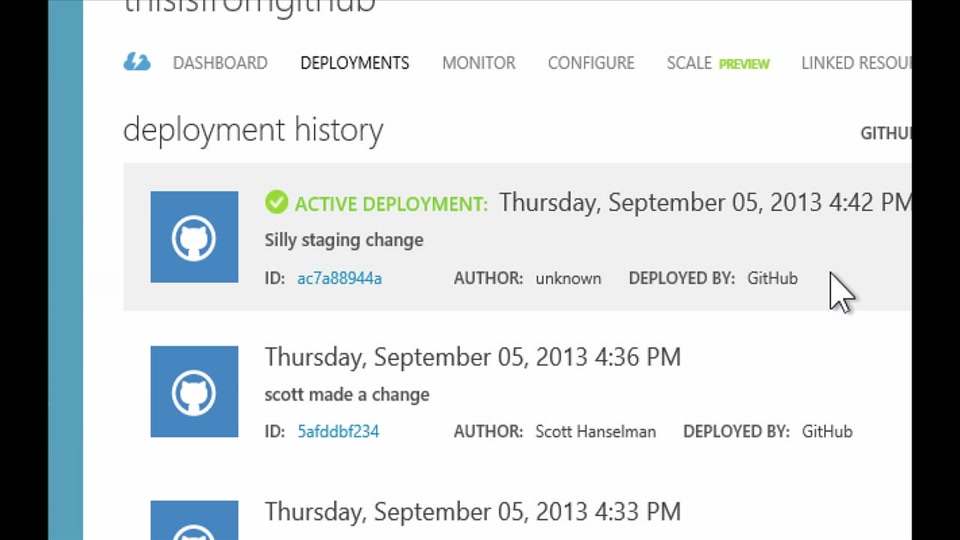
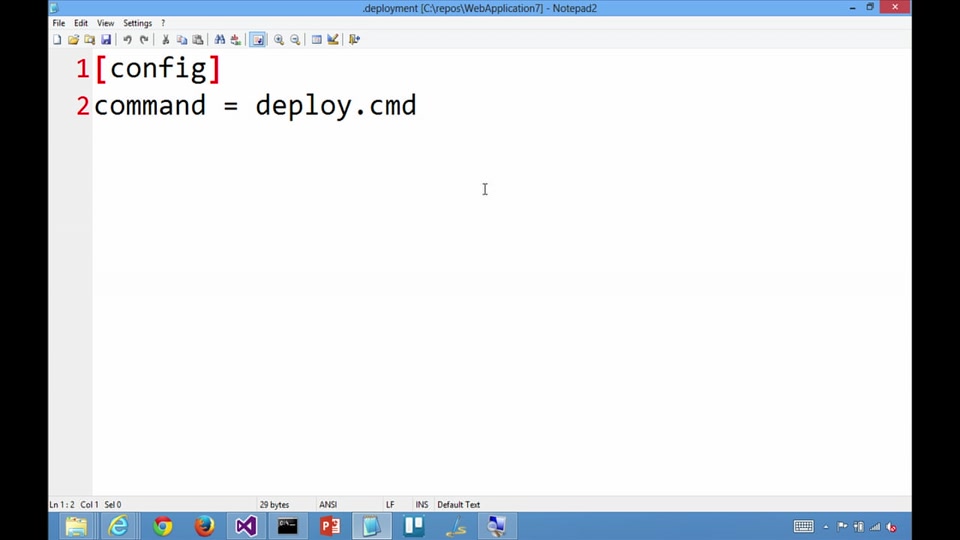
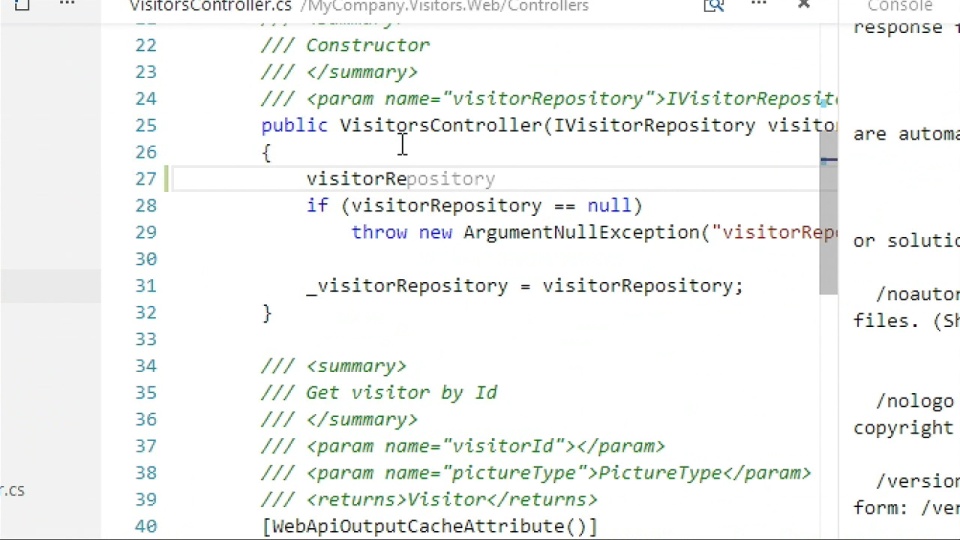
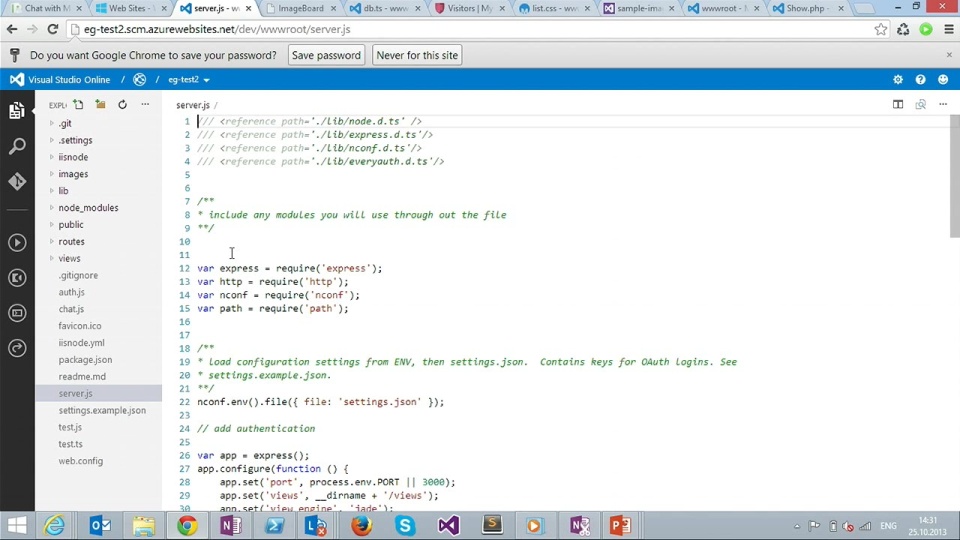
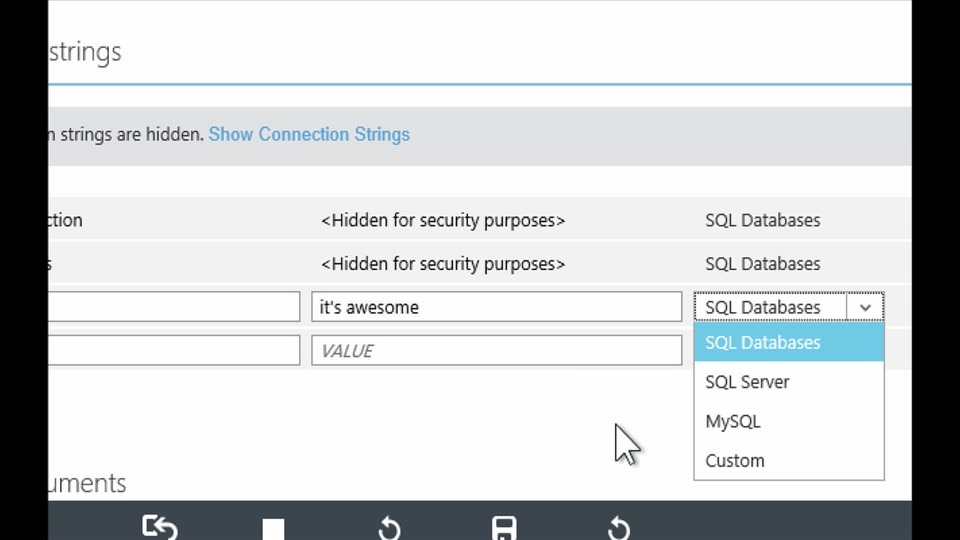

Rick G. Garibay (@rickggaribay) announced on 11/25/2013 a Neudesic Webinar: Enabling Rich Messaging Endpoints with Windows Azure BizTalk Services to be held 12/10/2013.
<Return to section navigation list>
Other Cloud Computing Platforms and Services
‡ Jeff Barr (@jeffbarr) announced Cross-Region Read Replicas for Amazon RDS for MySQL on 11/26/2013:
You can now create cross-region read replicas for Amazon RDS database instances!
This feature builds upon our existing support for read replicas that reside within the same region as the source database instance. You can now create up to five in-region and cross-region replicas per source with a single API call or a couple of clicks in the AWS Management Console. We are launching with support for version 5.6 of MySQL.
Use Cases
You can use this feature to implement a cross-region disaster recovery model, scale out globally, or migrate an existing database to a new region:
Improve Disaster Recovery - You can operate a read replica in a region different from your master database region. In case of a regional disruption, you can promote the replica to be the new master and keep your business in operation.
Scale Out Globally - If your application has a user base that is spread out all over the planet, you can use Cross Region Read Replicas to serve read queries from an AWS region that is close to the user.
Migration Between Regions - Cross Region Read Replicas make it easy for you to migrate your application from one AWS region to another. Simply create the replica, ensure that it is current, promote it to be a master database instance, and point your application at it.
You will want to pay attention to replication lag when you implement any of these use cases. You can use Amazon CloudWatch to monitor this important metric, and to raise an alert if it reaches a level that is unacceptably high for your application:
As an example of what you can do with Cross Region Replicas, here's a global scale-out model. All database updates (green lines) are directed to the database instance in the US East (Northern Virginia) region. All database queries (black lines) are directed to in-region or cross-region read replicas, as appropriate:
Creating Cross-Region Read Replicas
The cross-region replicas are very easy to create. You simply select the desired region (and optional availability zone) in the AWS Management Console:
You can also track the status of each of your read replicas using RDS Database Events.
All data transfers between regions are encrypted using public key encryption. You pay the usual AWS charges for the database instance, the associated storage, and the data transfer between the regions. …


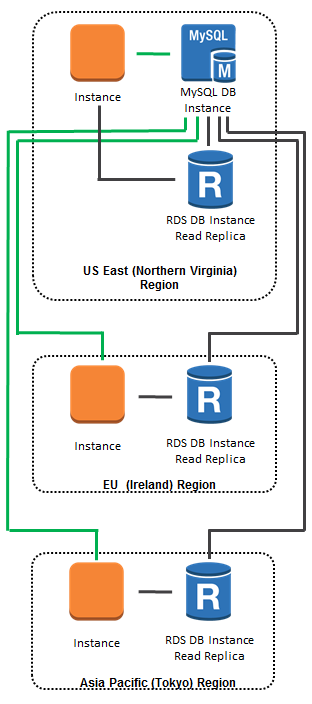

‡ Werner Vogels (@werner) posted Expanding the Cloud: Enabling Globally Distributed Applications and Disaster Recovery to his All Things Distributed blob on 11/26/2013:
As I discussed in my re:Invent keynote earlier this month, I am now happy to announce the immediate availability of Amazon RDS Cross Region Read Replicas, which is another important enhancement for our customers using or planning to use multiple AWS Regions to deploy their applications. Cross Region Read Replicas are available for MySQL 5.6 and enable you to maintain a nearly up-to-date copy of your master database in a different AWS Region. In case of a regional disaster, you can simply promote your read replica in a different region to a master and point your application to it to resume operations. Cross Region Read Replicas also enable you to serve read traffic for your global customer base from regions that are nearest to them.
About 5 years ago, I introduced you to AWS Availability Zones, which are distinct locations within a Region that are engineered to be insulated from failures in other Availability Zones and provide inexpensive, low latency network connectivity to other Availability Zones in the same region. Availability Zones have since become the foundational elements for AWS customers to create a new generation of highly available distributed applications in the cloud that are designed to be fault tolerant from the get go. We also made it easy for customers to leverage multiple Availability Zones to architect the various layers of their applications with a few clicks on the AWS Management Console with services such as Amazon Elastic Load Balancing, Amazon RDS and Amazon DynamoDB. In addition, Amazon S3 redundantly stores data in multiple facilities and is designed for 99.999999999% durability and 99.99% availability of objects over a given year. Our SLAs offer even more confidence to customers running applications across multiple Availability Zones. Amazon RDS offers a monthly uptime percentage SLA of 99.95% per Multi-AZ database instance. Amazon EC2 and EBS offer a monthly uptime percentage SLA of 99.95% for instances running across multiple Availability Zones.
As AWS expanded to 9 distinct AWS Regions and 25 Availability Zones across the world during the last few years, many of our customers started to leverage multiple AWS Regions to further enhance the reliability of their applications for disaster recovery. For example, when a disastrous earthquake hit Japan in March 2011, many customers in Japan came to AWS to take advantage of the multiple Availability Zones. In addition, they also backed up their data from the AWS Tokyo Region to AWS Singapore Region as an additional measure for business continuity. In a similar scenario here in the United States, Milind Borate, the CTO of Druva, an enterprise backup company using AWS told me that after hurricane Sandy, he got an enormous amount of interest from his customers in the North Eastern US region to replicate their data to other parts of the US for Disaster Recovery.
Up until AWS and the Cloud, reliable Disaster Recovery had largely remained cost prohibitive for most companies excepting for large enterprises. It traditionally involved the expense and headaches associated with procuring new co-location space, negotiating pricing with a new vendor, adding racks, setting up network links and encryption, taking backups, initiating a transfer and monitoring it until the operation complete. While the infrastructure costs for basic disaster recovery could have been very high, the associated system and database administration costs could be just as much or more. Despite incurring these costs, given the complexity, customers could have found themselves in a situation where the restoration process does not meet their recovery time objective and/or recovery point objective. AWS provides several easy to use and cost effective building blocks to make disaster recovery very accessible to customers. Using the S3 copy functionality, you can copy the objects/files that are used by your application from one AWS Region to another. You can use the EC2 AMI copy functionality to make your server images available in multiple AWS Regions. In the last 12 months, we launched EBS Snapshot Copy, RDS Snapshot Copy, DynamoDB Data Copy and Redshift Snapshot Copy, all of which help you to easily restore the full stack of your application environments in a different AWS Region for disaster recovery. Amazon RDS Cross Region Read Replica is another important enhancement for supporting these disaster recovery scenarios.
We have heard from Joel Callaway from Zoopla, a property listing and house prices website in UK that attracts over 20 million visits per month, that they are using the RDS Snapshot Copy feature to easily transfer hundreds of GB of their RDS databases from the US East Region to the EU West (Dublin) Region every week using a few simple API calls. Joel told us that prior to using this feature it used to take them several days and manual steps to set up a similar disaster recovery process. Joel also told us that he is looking forward to using Cross Region Read Replicas to further enhance their disaster recovery objectives.
AWS customers come from over 190 countries and a lot of them in turn have global customers. Cross Region Read Replicas also make it even easier for our global customers to scale database deployments to meet the performance demands of high-traffic, globally disperse applications. This feature enables our customers to better serve read-heavy traffic from an AWS Region closer to their end users to provide a faster response time. Medidata delivers cloud-based clinical trial solutions using AWS that enable physicians to look up patient records quickly and avoid prescribing treatments that might counteract the patient’s clinical trial regimen. Isaac Wong, VP of Platform Architecture with Medidata, told us that their clinical trial platform is global in scope and the ability to move data closer to the doctors and nurses participating in a trial anywhere in the world through Cross Region Read Replicas enables them to shorten read latencies and allows their health professionals to serve their patients better. Isaac also told us that using Cross Region Replication features of RDS, he is able to ensure that life critical services of their platform are not affected by regional disruption. These are great examples of how many of our customers are very easily and cost effectively able to implement disaster recovery solutions as well as design globally scalable web applications using AWS.
Note that building a reliable disaster recovery solution entails that every component of your application architecture, be it a web server, load balancer, application, cache or database server, is able to meet the recovery point and time objectives you have for your business. If you are going to take advantage of Cross Region Read Replicas of RDS, make sure to monitor the replication status through DB Event Notifications and the Replica Lag metric through CloudWatch to ensure that your read replica is always available and keeping up. Refer to the Cross Region Read Replica section of the Amazon RDS User Guide to learn more.


Janikiram MSV and Jo Maitland (@JoMaitlandSF, pictured below) posted AWS re:Invent 2013: highlights and analysis to the GigaOm Research blog on 11/19/2013 (missed when published). From the Executive Summary:
AWS re:Invent 2013 was bigger and better than last year’s event. Amazon’s second annual cloud computing trade show saw over 8,000 attendees, 200 sessions, and 400 speakers: easily the largest cloud event in the industry to date.
The energetic atmosphere at the venue resembled Microsoft developer shows during the ’ 90s, which witnessed the launch of Windows and .NET. The expo was so jammed that it was tough to get down the aisles. The frenzy and excitement seen at the partner booths and the overall participation of the ecosystem indicates the growing influence of AWS on the industry. Increasingly AWS looks like the new Microsoft, with its cloud platform becoming the new Windows.
Amazon didn’t miss an opportunity to tell the world that it has gone beyond startups to become the cloud of choice for enterprises. AWS executives dropped the logos of GE, Shell, Samsung, Dow Jones, Tokyo Stock Exchange, Unilever, and Nasdaq liberally, making the statement that enterprises are on its cloud. It now employs thousands of field sales representatives across the globe and has invested in professional services focused squarely on enterprise customer adoption.
The company made it clear, however, that it has no intention of building a large enterprise sales force. It’s developing a more technical, instantly credible sales team that doesn’t need a sales engineer on every call to get a question answered. “We’re not spending time on the golf course,” said Andy Jassy, the SVP at Amazon, taking a shot at the bloated, ponderous legacy IT vendors. “We’re pretty adamant we represent something different,” he said.
The event also saw a huge increase in the focus on partners and ecosystem. The Amazon Partner Network (APN) program now classifies partners into categories like security and the public sector. The new competencies related to SAP and Oracle endorse the capabilities of qualified partners to deliver niche solutions. Two new certifications related to administration and development on AWS were launched at re:Invent.
More than anything, it was clear that AWS re:Invent has become the biggest occasion to release new products and features at Amazon Web Services. Last year it was just the Redshift announcement that made a splash at the event. This year’s event was used to announce over half a dozen new features and services.
Amazon widened the gap with its competition by moving up the stack. It has ventured into niche, new areas that will take considerable time for the competition to catch up.


Reading the report requires a trial or paid subscription to GigaOm Research.
Full disclosure: I’m a registered GigaOm analyst (thanks to Jo.)
<Return to section navigation list>


0 comments:
Post a Comment